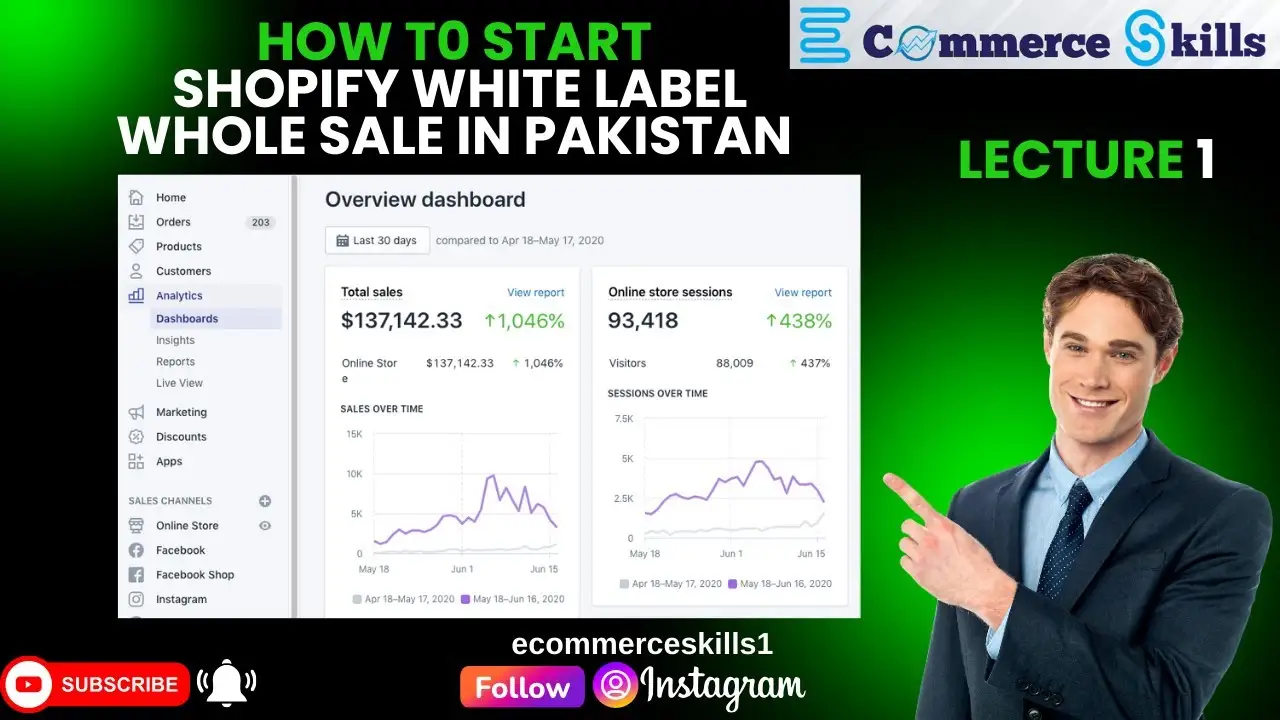
Setting up an Amazon seller account can look simple at first. You enter your information, verify your identity, and start adding products. In practice, there are several important choices to make before you reach your first sale. Your selling plan, documents, fulfillment method, product listings, and account settings can all affect how smoothly you get started.
If you want to set up Amazon seller account access in 2026, it helps to understand the process before you begin. Amazon currently divides seller registration into five main steps: business information, seller information, billing information, store and product information, and identity verification. After registration, most daily work happens inside Seller Central, where sellers can create listings, manage inventory, view payments, handle orders, and check account health.
This guide focuses mainly on selling through Amazon.com in the United States. Fees, documents, tax rules, and some verification steps can differ in other marketplaces. Amazon also changes seller tools and policies over time, so sellers should check official Amazon Seller News and Seller Central notices when making important account decisions.
What to Know Before Setting Up Your Amazon Seller Account
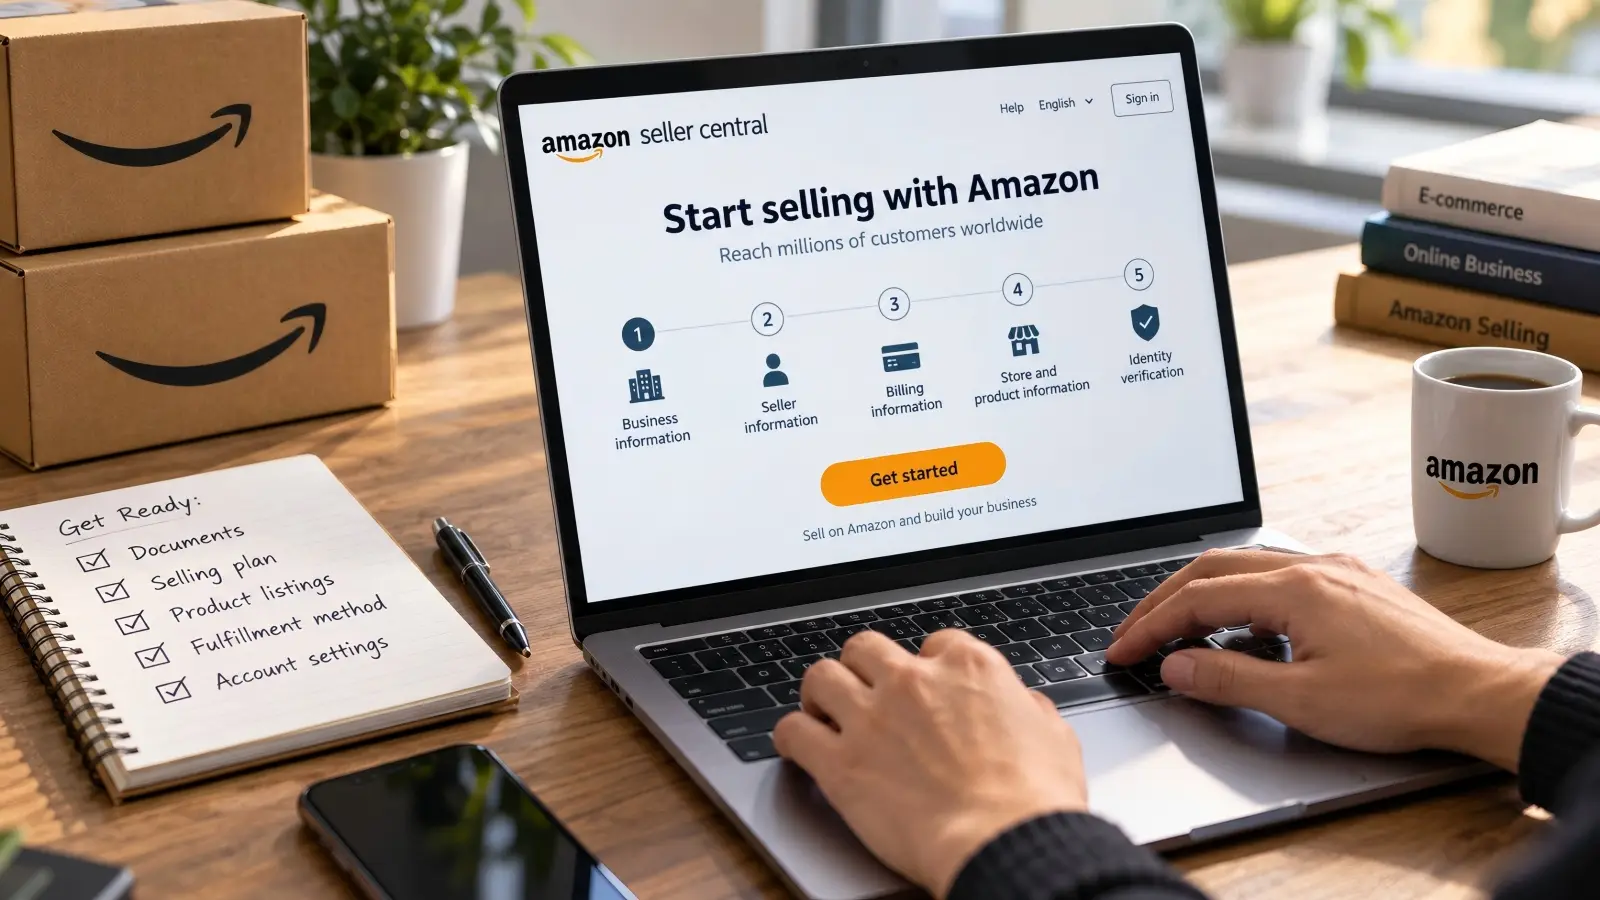
A little preparation can save a lot of trouble during registration. One of the most common reasons a new seller gets delayed is not a complicated Amazon rule. It is often something small, such as a name that does not match a bank statement or an address entered in a different format.
Before you set up an Amazon seller account, gather your documents and decide how you plan to sell. You should also think about how many products you expect to sell each month. This will help you choose between the Individual and Professional selling plans.
What Information and Documents Are Required
Amazon asks for both business and personal information during registration. If you have a registered company, you may need your legal business name, business location, registration number, registered address, and phone number. Amazon says a company registration number is different from an EIN. If you are selling as an individual, you do not need to create an LLC just to open an Amazon selling account.
You will also provide details about the person responsible for the account. These can include your full legal name, citizenship, country of birth, date of birth, residential address, and phone number. Amazon may also ask whether you are a beneficial owner or legal representative of the company. Amazon currently defines a beneficial owner as someone who directly or indirectly owns more than 25% of the business or voting rights, although the information requested can depend on your business structure.
You should normally prepare the following information before starting:
| What to prepare |
Why Amazon may need it |
| Government-issued photo ID |
Confirms the identity of the primary contact |
| Business registration details |
Confirms your legal business information if you operate a registered company |
| Residential or business address |
Used during identity and business verification |
| Bank account |
Used to receive Amazon payouts |
| Chargeable credit card |
Used for seller charges and expenses |
| Phone number |
Used for communication and account verification |
| Product information |
Helps Amazon understand what you plan to sell |
| GTIN, UPC, EAN, ISBN, or other product ID when required |
Helps connect products with Amazon catalog pages |
| Recent bank or credit card statement |
May be requested as proof of address |
During identity verification, Amazon says sellers can be asked to upload a government-issued ID and proof of residential or business address dated within the previous 180 days. Documents should be clear, complete, and readable. Amazon specifically warns against blurry files and screenshots.
How to Choose Between Individual and Professional Accounts
Amazon currently offers two main selling plans in the United States. The Individual plan has no fixed monthly subscription fee. Instead, Amazon charges $0.99 for each item sold, in addition to other applicable selling fees. The Professional plan costs $39.99 per month plus applicable selling fees.
The right option depends on the size and needs of your business.
| Individual plan |
Professional plan |
| $0.99 per item sold |
$39.99 per month |
| No fixed monthly subscription |
Fixed monthly subscription |
| Better suited to low-volume testing |
Better suited to regular or growing sales |
| Essential Seller Central tools |
More advanced tools and programs |
| Useful if selling only a few items |
Useful for bulk listings, advertising, reporting, and scaling |
Amazon suggests that sellers expecting to sell fewer than about 40 items per month may find the Individual plan more suitable. The Professional plan includes access to more selling tools, such as bulk listing features, advertising options, detailed reports, and additional programs.
For example, imagine you are testing five handmade kitchen products and expect to sell 15 units during your first month. An Individual plan may be enough while you learn the platform. If sales later grow to 100 units each month and you want Amazon Ads and bulk listing tools, changing to Professional may make more sense.
Common Mistakes to Avoid During Setup
The safest way to register is to use information exactly as it appears on your official records. If your passport says "Michael Andrew Smith," entering "Mike Smith" can create an unnecessary mismatch. The same applies to addresses, company names, and bank account holder names. Amazon states that the bank account used for payouts must be held in the primary contact's name or the business's name.
Document quality matters too. Do not crop important parts of an ID, upload an unreadable photo, or edit a bank statement to make it look cleaner. Amazon asks for high-quality color scans or photos showing all four corners of documents and says sellers should not submit screenshots or blurry files. Preparing clean originals before registration is much easier than trying to solve a verification problem later.
Another mistake is starting registration before deciding who will legally own and manage the account. Business names, payment information, identity documents, and account ownership should tell the same story. Being an amazing seller is not about finding shortcuts during registration. It starts with accurate records and a business setup you can maintain over time.
How to Start the Amazon Seller Account Setup Process
Once your information is ready, the actual registration process is fairly direct. Amazon says registration itself can often be completed within a few hours, although identity verification can take longer. Verification usually takes three business days or less, but actual timing can vary.
You do not need special software to begin. Registration starts through Amazon's official selling website. After the account is approved, Seller Central becomes your main dashboard for managing the business.
Where to Begin the Registration Process
Go to Amazon's official Sell on Amazon site and select Sign up. Amazon currently recommends using an email address that is different from an existing Amazon customer or Amazon Business account when possible. However, there is an important exception. If you already use Amazon Brand Registry, Amazon Ads, or Vendor Central, Amazon recommends using the same email and password so access can be synchronized.
Do not confuse Seller Central with Vendor Central. Seller Central is designed for businesses and entrepreneurs selling products as third-party sellers. Vendor Central is an invitation-only system where a vendor sells products wholesale to Amazon, and Amazon then distributes those products. A normal new seller who wants to sell directly to Amazon customers should generally be looking for Seller Central registration, not Vendor Central registration.
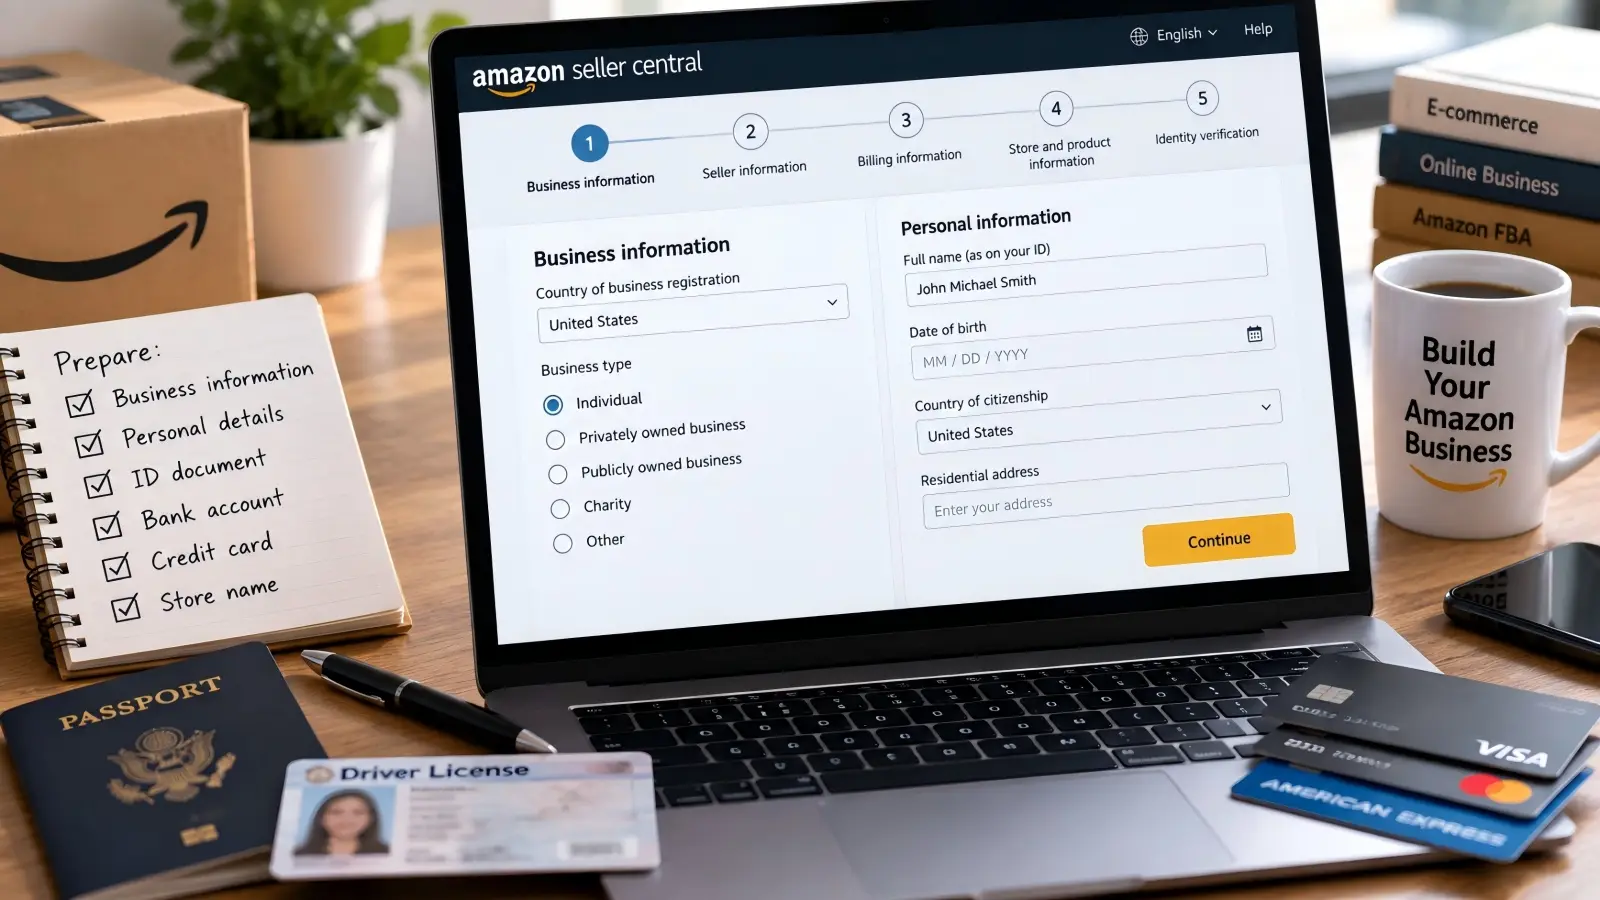
Amazon currently organizes registration into five steps:
- Provide business information.
- Provide seller information.
- Provide billing information.
- Provide store and product information.
- Complete identity verification.
How to Enter Your Business and Personal Details
Start by choosing the country where your business is registered. If you do not have an incorporated business, choose the country where you operate. You will then identify your business type. Amazon allows individuals to register, so a seller without an incorporated company can select the option that states they are an individual.
Registered companies should enter their legal business name exactly as it appears in government records. Amazon may also request the company registration number and registered business address. Next, enter the personal details of the primary contact using a government-issued ID as your reference. Keeping the spelling and address format consistent across these fields can reduce the chance of a verification mismatch.
Amazon will later ask for the name that customers will see as your store name. This does not have to be identical to your legal business name. The store name must, however, be unique on Amazon. Amazon can also ask about your product codes, business certifications, and whether you manufacture or own the brand of the products you plan to sell.
Setting Up Your Payment Method
Amazon asks for both banking and credit card information during registration. Your bank account is used to receive sales proceeds. The account holder should be either the primary contact or the business, depending on how the bank account is registered.
A US bank account is not always required. Amazon says eligible sellers can use Amazon Currency Converter to receive funds in supported bank accounts outside the United States. For the charge method, Amazon's current registration guide lists American Express, Diners Club, Discover, JCB, MasterCard, and Visa as accepted card types.
Double-check these details before submitting them. A bank account with a different holder name or an expired payment card can create unnecessary problems later. You should also separate Amazon's own login from third-party software accounts. For example, a sellerboard login belongs to sellerboard, a separate analytics service, and is not the login used for Amazon Seller Central.
How to Complete the Amazon Seller Account Verification
Identity verification is one of the most important parts of the process to set up Amazon seller account access. Amazon uses it to confirm who controls the business and whether the documents match the information submitted during registration. This is why accuracy earlier in the process matters so much.
The exact method is not identical for every seller. Depending on the account and location, you may be asked to verify yourself using documents and a face photo or through a video call with an Amazon representative.
What to Expect During the Verification Process
After submitting your store and product details, Amazon can ask you to upload a government-issued ID and recent proof of address. The proof may include a bank or credit card statement. Amazon states that proof of residential or business address used in this stage should generally be dated within the previous 180 days.
You may then be asked to take a photo of your face and ID or complete a video call. If a video call is required, an Amazon representative may check the original documents you used during registration. Amazon guidance for sellers recommends having the original versions ready rather than relying only on copies stored on your computer.
Do not assume that every account will receive the same questions. Verification methods can change by marketplace and seller situation. Follow the instructions shown in your own Seller Central account rather than copying a process described in an old forum post or video.
How to Prepare for Amazon's Verification Interview
If Amazon requests a video interview, prepare your original documents before the appointment. Use a device with a working front-facing camera and microphone, and make sure your internet connection is stable. Amazon guidance has also advised sellers to use a supported browser such as Chrome or Safari when joining the call.
Keep your ID, proof of address, and any business documents mentioned in Amazon's message beside you. The information you show should match what you submitted during registration. An Amazon staff post about video verification notes that calls can typically take around 10 to 20 minutes, although actual times can vary.
It can help to treat the call like a normal business verification rather than an interview you need to "pass." You do not need a clever explanation or a prepared sales pitch. You mainly need accurate documents, a clear camera, and consistent information.
Why Verification Might Fail and How to Fix It
Verification problems often come from documents that Amazon cannot clearly connect to the information in the account. A misspelled name, different address, expired ID, incomplete statement, or low-quality image can slow the process. Amazon specifically asks sellers to submit readable color scans or photos that show the full document.
If verification fails, read the notice carefully before uploading something new. Identify exactly which field or document Amazon is asking you to correct. Then compare your Seller Central information with the original document line by line. Avoid repeatedly submitting different versions of the same incorrect information, because that does not address the reason for the rejection.
For example, suppose your business registration says "Green Field Home LLC," while your application says "Greenfield Home." The difference may look minor to you, but it creates two different legal names. Correcting the account information so it matches the official record is more useful than uploading the same business document several times.
How to Choose the Right Fulfillment Method: FBA vs. FBM
Opening the account is only the start. You also need to decide what happens after a customer buys your product. Amazon sellers usually choose between Fulfillment by Amazon, or FBA, and Fulfilled by Merchant, or FBM.
You do not have to use one method for your entire business. Amazon allows sellers to use FBM for some products and FBA for others. This gives you room to choose based on each product's size, sales speed, storage needs, and profit margin.
What Are the Differences Between FBA and FBM
With FBA, you send inventory to Amazon's fulfillment network. Amazon stores the products and handles picking, packing, shipping, customer service, and returns for FBA orders. FBA products can also qualify for Prime delivery benefits.
With FBM, you store the product yourself or through your own warehouse partner. When a customer orders, you are responsible for packing and shipping it. You also take greater responsibility for customer service, returns, delivery performance, and order handling.
| FBA |
FBM |
| Amazon stores inventory |
Seller stores inventory |
| Amazon picks and packs orders |
Seller picks and packs orders |
| Amazon handles FBA shipping |
Seller arranges shipping |
| Amazon handles FBA customer service and returns |
Seller has more direct responsibility |
| FBA fulfillment and storage costs apply |
Seller pays its own storage and shipping costs |
| Useful for outsourcing fulfillment |
Useful when the seller wants more control |
How to Decide Which Fulfillment Method Fits Your Business
Think about the product rather than asking which method is always better. A small, fast-selling item may work well with FBA because outsourcing storage and shipping can save operational time. A large, slow-moving, temperature-sensitive, or unusual product may sometimes be easier to manage through FBM. Amazon itself lists heavy, bulky, slow-moving, and temperature-sensitive products as examples where merchant fulfillment can be useful.
For example, imagine a seller offers a compact kitchen organizer and a large handmade wooden table. Sending hundreds of small organizers to FBA could make daily order handling easier. The table may be better kept in the seller's own warehouse because of its size and special delivery needs. There is no reason both products must use the same fulfillment method.
Before deciding, use Amazon's Revenue Calculator. Amazon lets sellers compare estimated fees, costs, and revenue for Amazon fulfillment and their own fulfillment method. This is more useful than choosing FBA simply because another seller says it is cheaper.
Risks and Benefits of Each Fulfillment Option
FBA reduces the amount of daily fulfillment work a seller has to perform. That can become valuable when orders increase. However, FBA is not free. Sellers can face per-unit fulfillment costs, monthly storage costs, aged-inventory costs, returns processing costs, removal or disposal costs, and inbound placement costs depending on their inventory and activities.
Amazon's seller news for the 2026 US fee update stated that FBA fees increased by an average of $0.08 per unit sold, with most changes taking effect on January 15, 2026. Amazon also said it introduced no new FBA fee types for 2026. The impact on a specific seller can still be very different depending on product dimensions, weight, inventory levels, and fulfillment choices.
FBM avoids many FBA-specific storage and fulfillment charges, but those costs do not disappear. You still need storage, packing materials, labor, shipping, and return handling. You must also meet Amazon's delivery and customer-service requirements. For this reason, compare the full cost of each method rather than comparing only Amazon's visible fulfillment fee.
How to List Products and Start Selling on Amazon
After your account is ready, you can start building product listings. If the product already exists in Amazon's catalog, you may be able to add your offer to the existing product detail page. If it does not exist, you may need to create a new detail page.
In many cases, Amazon uses a GTIN to identify a product. Common examples include UPC, EAN, ISBN, and JAN codes. Amazon notes that sellers may sometimes need to obtain a GTIN through GS1, although requirements can depend on the product and category.
How to Create Effective Product Listings
A strong product detail page should explain exactly what the customer will receive. Amazon's current listing tools include fields for product identity, descriptions, bullet points, images, product details, offer information, and safety or compliance information. Sellers can add up to five main bullet points and up to nine product photos through the listing process described in Amazon's 2026 guide.
The description should answer basic customer questions without making the shopper work for the information. Explain the size, materials, intended use, important features, and any limitations that matter. Good photos should show the actual product clearly from useful angles. The goal of an AMZ listing is not simply to contain more text than a competitor. The goal is to give shoppers enough accurate information to make a buying decision.
For example, "Premium Storage Box" tells the customer very little. A better listing would explain its dimensions, material, capacity, closure style, and intended use. Accurate details can also reduce returns because customers have a clearer idea of what they are ordering.
How to Optimize Listings for Better Visibility
Amazon search optimization starts with understanding the words customers use. Amazon recommends using relevant customer-friendly search terms in titles, descriptions, bullet points, and other listing fields. Sellers with eligible brands enrolled in Brand Registry can also use Brand Analytics tools such as Search Query Performance and Top Search Terms to study how customers search.
There is also a major 2026 change to keep in mind. Starting July 27, 2026, Amazon requires product titles in all categories except Media to be no more than 75 characters, including spaces. Amazon introduced an additional Item Highlights field with up to 125 characters. Both the item name and Item Highlights can contribute to search discoverability.
That means old advice about filling a very long title with keywords is no longer useful for most categories. Put the most important information in the title, then use Item Highlights, bullet points, product attributes, and descriptions for supporting details. Avoid forcing the same keyword into every field. Clear listing content can serve both Amazon search and real customers better than obvious keyword stuffing.
How to Manage Inventory and Orders
Inventory problems can hurt sales even when the listing itself is strong. If you use FBA, watch inventory levels and storage age so you can reorder before a fast-selling item runs out while avoiding too much slow-moving stock. Seller Central provides inventory and fulfillment reports that can help sellers understand current stock and expected costs.
For FBM orders, you need a reliable routine for checking new orders, packing them, buying shipping labels, confirming shipment, and responding to buyers when required. Amazon identifies Late Shipment Rate, Pre-fulfillment Cancellation Rate, and Valid Tracking Rate as important metrics for merchant-fulfilled sellers. These can be monitored along with other performance information through Seller Central.
A simple example shows why forecasting matters. If you sell ten units a day and it takes your supplier 30 days to deliver new inventory, waiting until only 50 units remain is already too late. Good inventory management begins long before the product reaches zero.
How DICloak Can Help Manage Amazon Seller Accounts More Consistently
Once an Amazon seller account is active, daily account management becomes just as important as the initial setup. Sellers may need to keep browser settings organized, manage approved network connections, and give team members access to the right tools without sharing everything. This becomes more important when a business manages several authorized seller workflows or has several employees working in Seller Central.
DICloak is an antidetect browser designed around separate browser Profiles, network settings, and team access controls. For legitimate Amazon seller operations, these features can help teams keep workspaces organized and reduce accidental changes between different account workflows. Sellers should still follow Amazon's account, access, and marketplace policies when using any third-party browser or management tool.
Keep Each Amazon Seller Workflow in a Separate Browser Profile
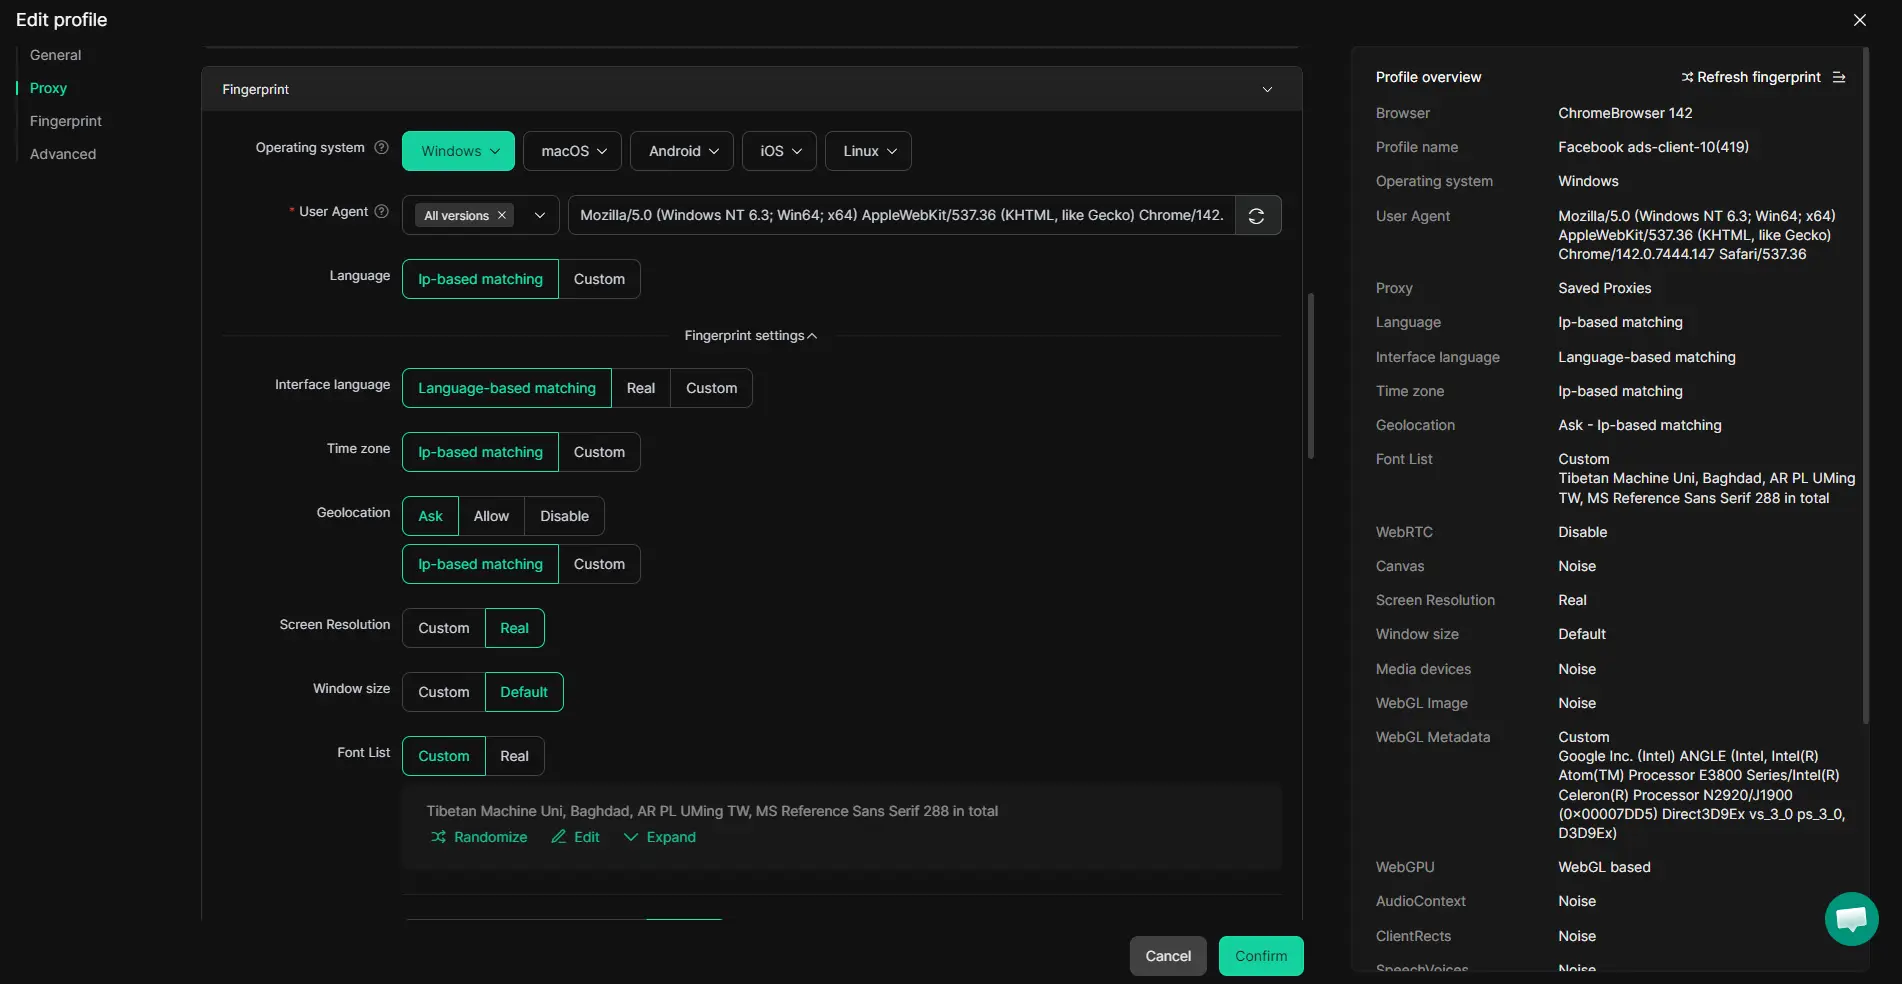
DICloak lets users create separate browser Profiles with their own cookies, sessions, cache, local storage, and browser settings. Users can also configure settings such as operating system, user agent, language, time zone, fonts, Canvas, WebGL, and other browser parameters at the Profile level. This makes it easier to keep one working environment separate from another instead of mixing sessions inside the same browser.
For example, a team may use one Profile for an authorized Amazon seller workflow and another Profile for a different business workspace. Each Profile can keep its own saved session and settings. This can make daily Seller Central access easier to organize, especially when several people or business units use the same computers.
The main goal is consistency rather than constant changes. A seller should avoid randomly changing browser settings every time a Profile opens. Instead, users can keep a stable setup that matches the way the account is normally managed.
Keep Network Settings Consistent for Each Profile
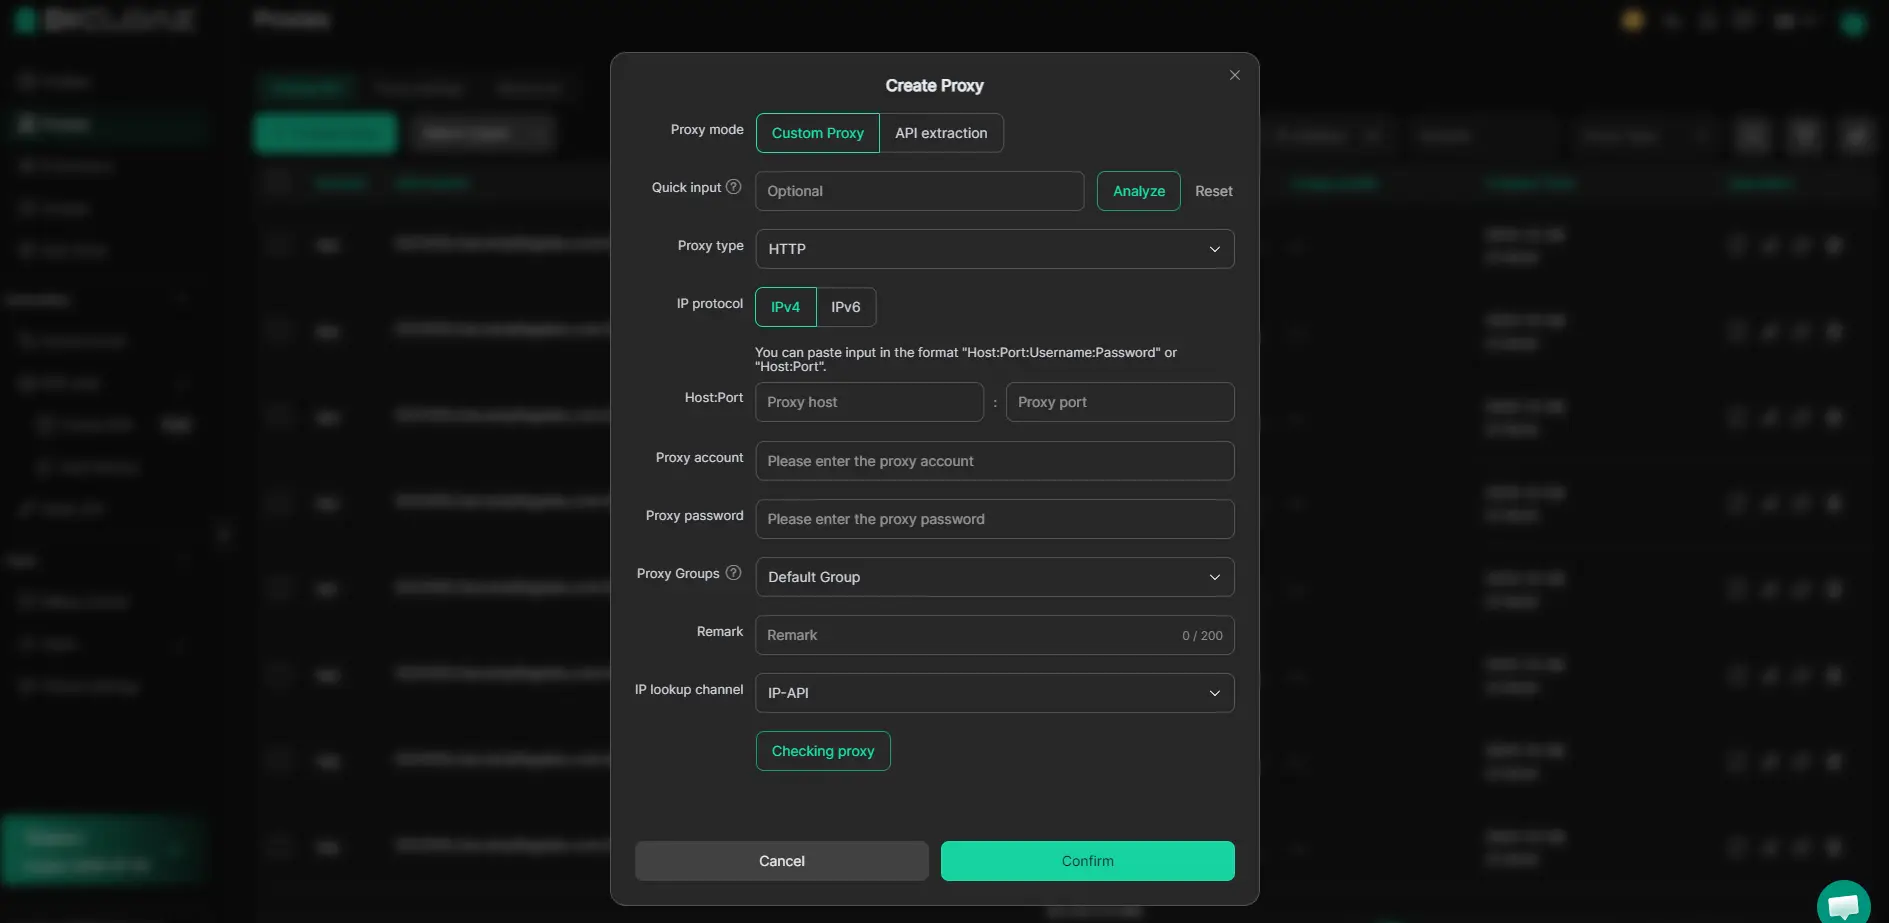
DICloak also allows users to assign a separate proxy connection to each Profile. Users can enter the proxy host, port, username, and password, then check the connection before opening the Profile. The browser can also match settings such as time zone, language, and geolocation with the IP location when needed.
For Amazon seller workflows, a stable network setup is generally easier to manage than frequently changing connections. For example, if an authorized US business normally manages Seller Central from one region, the team can keep that Profile connected through a consistent business network or authorized proxy rather than changing locations every session.
This feature should be used for normal business network management, not to misrepresent account ownership or location. Amazon can apply its own security and verification checks, so the information used in Seller Central should still match the seller's real business and account records.
Control Team Access and Protect Seller Account Data
Amazon businesses often involve more than one person. An owner may handle payments and account health, while another employee works on listings or inventory. DICloak lets teams create members and member groups, control which Profiles they can view or open, and limit actions such as creating or editing Profiles.
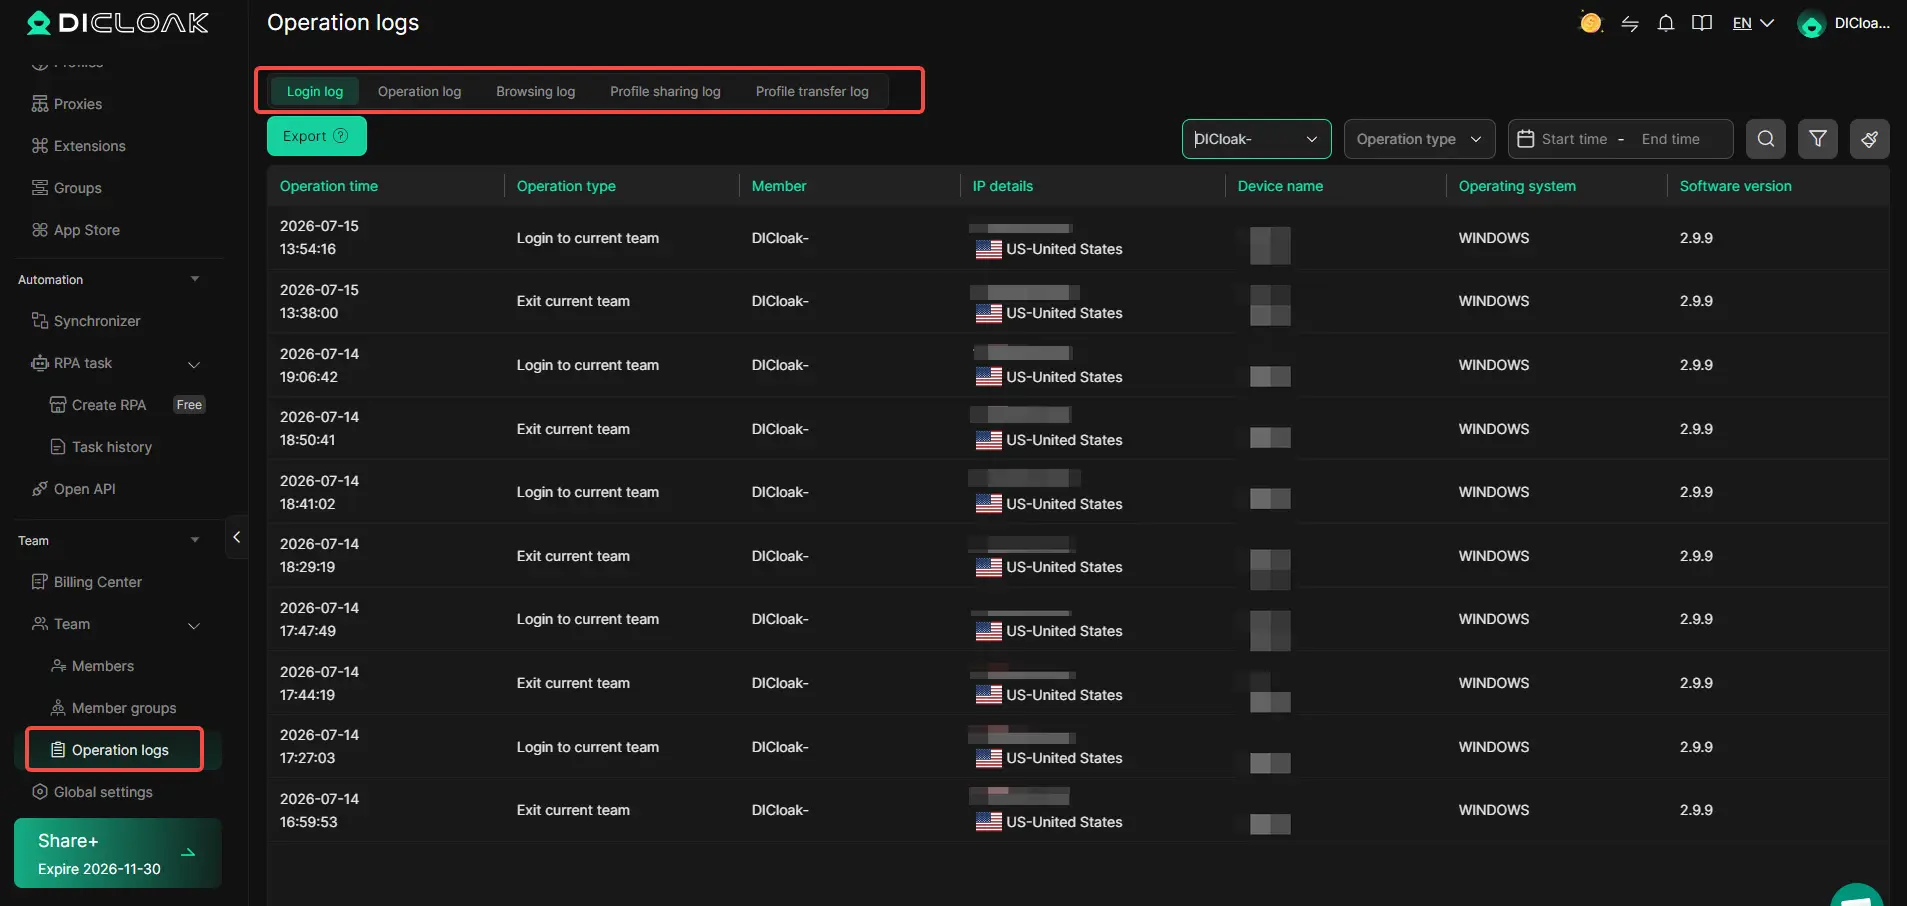
Additional browser security controls can help reduce accidental exposure of account data. Administrators can restrict access to saved passwords, browser developer tools, local extension installation, and Chrome extension settings. DICloak also provides operation logs so team managers can review activities such as logins, Profile access, sharing, transfers, and browsing records.
These controls do not replace Amazon Seller Central's own user permissions. A safer setup is to use Amazon's official permissions for Seller Central access and DICloak's Profile and team controls for the browser workspace itself. Together, they can make day-to-day seller account management easier to organize without relying on shared passwords or unrestricted device access.
FAQs About How to Set Up an Amazon Seller Account
1. How do I set up Amazon seller account access in 2026?
To set up Amazon seller account access, go to Amazon’s official seller registration page and enter your business, personal, billing, and store information. You will also need to complete identity verification before you can fully use Seller Central.
2. What documents do I need to set up an Amazon seller account?
To set up an Amazon seller account, you may need a government-issued ID, bank account details, a chargeable credit card, business information, and proof of address. Amazon may ask for extra documents depending on your business type and marketplace.
3. How much does it cost to set up an Amazon seller account?
The cost depends on the selling plan you choose. In the US, the Individual plan charges $0.99 per item sold, while the Professional plan costs $39.99 per month, plus other selling fees.
4. How long does it take to set up an Amazon seller account?
The registration form can often be completed in a few hours, but verification may take several business days. The total time can be longer if Amazon asks for more documents or additional identity checks.
5. Can I set up an Amazon seller account without an LLC?
Yes. You can set up Amazon seller account access as an individual in many cases, so an LLC is not always required. However, your tax, business, and legal setup should match how you actually operate.
Conclusion
Learning how to set up Amazon seller account access is only the first part of building a stable Amazon business. A good start means preparing the right documents, choosing the right selling plan, completing verification carefully, and understanding how Seller Central works before you begin selling.
After the account is active, focus on the parts that affect daily performance. Create clear product listings, choose between FBA and FBM based on your costs, watch inventory levels, and review Account Health regularly. It is also important to follow current Amazon seller news because fees, listing rules, and verification requirements can change over time.
The strongest approach is to keep your business information accurate and your workflow consistent. Do not rush registration or rely on shortcuts. When you understand your costs, protect account access, and manage each product with clear data, it becomes much easier to grow your Amazon store with fewer avoidable problems.
 Web Proxy Tools
 Free Tools
 Cookie Plugin
 UA Generator
 MAC Address Generator
 IP Generator
 IP Address List
 2FA Code Generator
 World Clock
 Anonymous Check
 WebRTC Leak Test
 UUID Generator
 Free Web Proxy Site
 Proxy Checker
 FB Ad Checker
 AI Web Scraping
 Free SMM Tools
 Twitter Shadowban Checker
 Instagram Name Checker
 UTM Generator
 Username Generator
 AI Hashtag Generator
 LinkedIn Headline Generator
 Social Media Image Resizer