Most people think you just pick a name and hit publish, but setting up a YouTube channel that actually works, meaning it gets approved, looks trustworthy, and avoids rookie mistakes, takes more than five minutes. If you get the setup wrong, you might run into age or region restrictions, lose access to features like custom thumbnails, or even hit a block that stops you from uploading at all. Many beginners realize too late that the real problems aren’t “how to make a YouTube channel” but what settings, account choices, and uploads make the difference between a channel that grows and one that gets stuck.
The biggest risk? Rushing through the process and using a throwaway email or skipping verification. That’s how you end up with a channel you can’t recover, or one that gets flagged before you even add your first video. Cheap shortcuts, like buying aged accounts or copying brand names, often backfire. You’ll need to make decisions about privacy, branding, and what information to use up front, not just after you create youtube channel.
A step-by-step guide isn’t just about clicking the right buttons. It’s about knowing what to skip, which settings lock you in, and how to avoid the most common traps that trip up new creators. Getting these details right saves you hours of frustration and sets you up for long-term growth.
Start with the account basics, here’s what to check before you create anything.
What Should You Decide Before Creating a YouTube Channel?
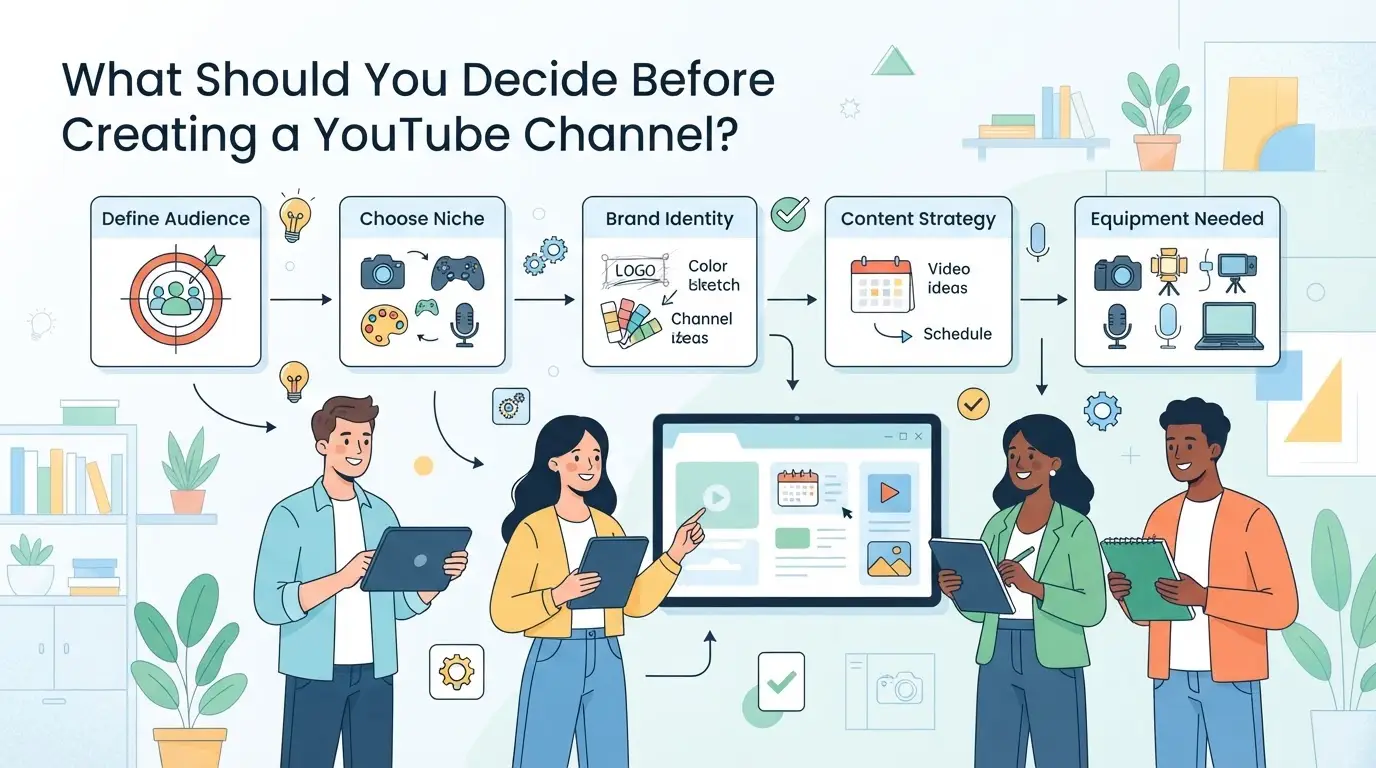
The first step isn’t clicking “Create”, it’s figuring out what you want from your channel, what information you’ll need, and which choices can’t be changed later. Rush this stage, and you might lock yourself into a setup that’s hard to fix.
Do you need a personal or brand account?
A personal account uses your Google identity, so everything ties to your real name and email. A brand account lets you name your channel, add or remove managers, and keep your identity private. If you plan to collaborate or use a custom name, start with a brand account, it’s harder to switch later.
What information and assets should you prepare?
Trying to set up a channel without the right assets leads to broken branding and recovery problems. Use an email you fully control, not a throwaway, and enable phone verification, YouTube sometimes locks new channels for suspicious activity, and missing verification can block recovery for weeks. Get your profile image and channel banner ready before you start; YouTube’s image guidelines change, but as of 2026, banners need to be at least 2048 x 1152 pixels. If you skip the channel description or upload a blurry icon, your page can look suspicious to both viewers and YouTube’s automated checks. One common failure: creators who copy-paste bios or use stock images sometimes trigger spam reviews, which may delay publishing by days or get your channel shadowbanned at launch. Always write your own text and use original images, even if they aren’t perfect.
What are the main rules and risks for new channels?
- Double-check YouTube’s latest policy rules, especially around copyright, spam, and deceptive practices.
- Don’t spam uploads or reuse content from other channels; new accounts flagged for spam can get auto-removed without notice.
- Avoid using fake names, suspicious links, or misleading branding, these trigger instant review holds and can delay your first video going live.
Once you’ve checked these basics, you’re ready to walk through the actual creation process. The next section breaks down each step so you don’t miss anything that could cause problems later.
How to Create a YouTube Channel: Step-by-Step (2026)
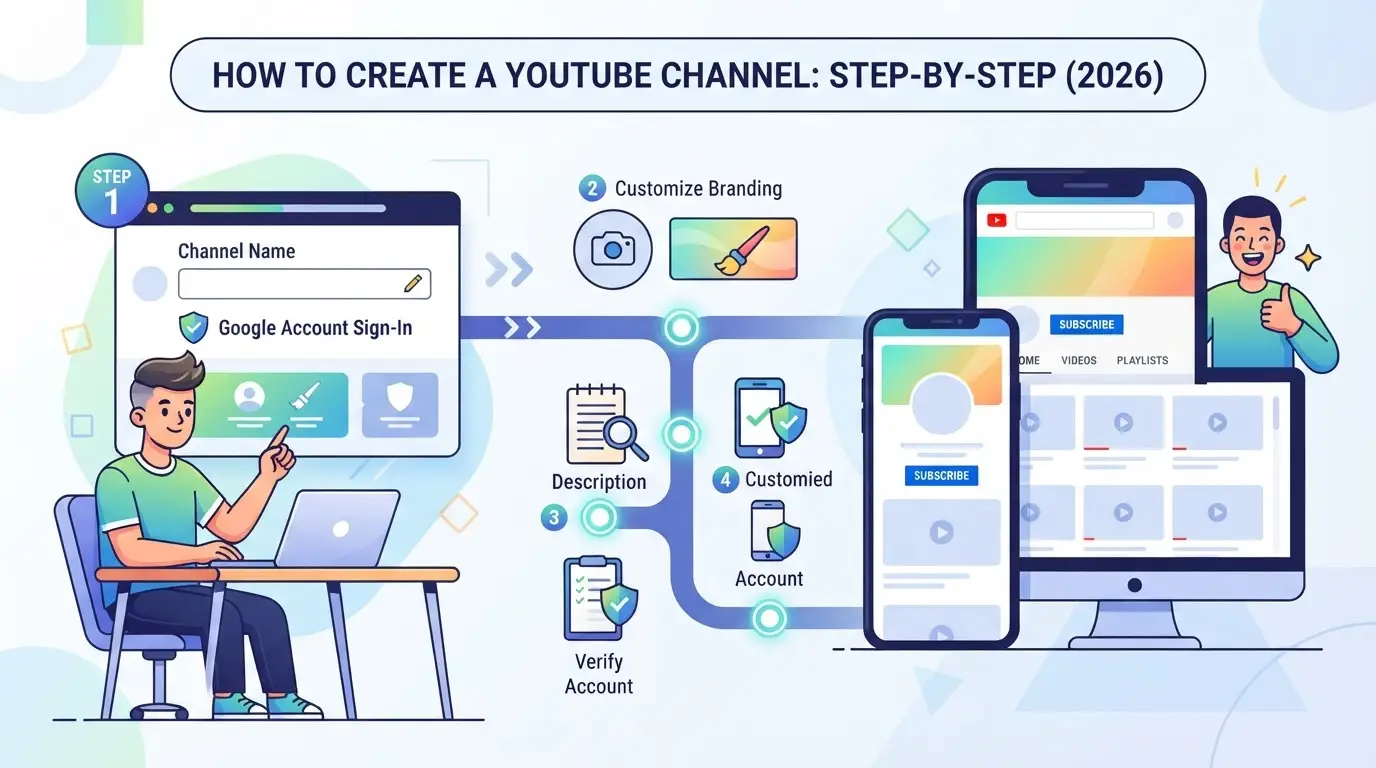
You’ve decided on your channel’s direction, now it’s time to build it right. Here’s how to set up a YouTube channel from zero, without missing a step that could trip you up down the road.
Step 1: Sign in with your Google account
- Go to YouTube and click “Sign in.”
- Use a dedicated Google account, not your personal email, this keeps your channel separate and safer if you ever add team members or collaborators.
- If you don’t have a Google account, click “Create account” and follow the prompts. Don’t rush, wrong details can lock you out later.
Step 2: Start your channel (personal or brand)
- Click your profile icon (top right) and select “Create a channel.”
- Choose “Use your name” for a personal channel, or “Use a custom name” to make a brand channel, brand lets you add others as managers later.
- If you pick personal now, switching to brand later takes extra steps, decide carefully before moving on.
Step 3: Name your channel and set a handle
- Enter your channel name and choose a unique handle (e.g., @yourbrandname).
- Handles must be unique, if you see an error, try a different version or add numbers.
- Your channel name is public and hard to change later, so avoid temporary or joke names.
Step 4: Customize your channel visuals
- Add a profile picture, use a clear logo or headshot. Blurry or generic images look unprofessional and can turn viewers away.
- Upload a banner (recommended size: 2048 x 1152 pixels), but keep text away from the edges, on mobile, the sides will get cropped.
- Write a channel description. Include your main topics and a contact link for business. If you skip this, your channel may look incomplete or suspicious.
- Set up external links (social media, website) if you have them, these show as icons on your channel page.
Step 5: Verify your channel and set privacy options
- Go to YouTube Studio > Settings > Channel > Feature eligibility.
- Click “Verify phone number.” Use a real, accessible number, SMS verification is instant, but recycled or online numbers often fail.
- After verifying, set your channel privacy and safety options. Check who can comment, whether your subscriptions are public, and if your channel is visible to search.
- Miss verification and you’ll be blocked from uploading videos longer than 15 minutes or using custom thumbnails.
Done right, these steps make your YouTube channel ready for real uploads and public discovery. Next up: the mistakes that can undo all this groundwork in a single click.
What Common Mistakes Should You Avoid When Setting Up a YouTube Channel?
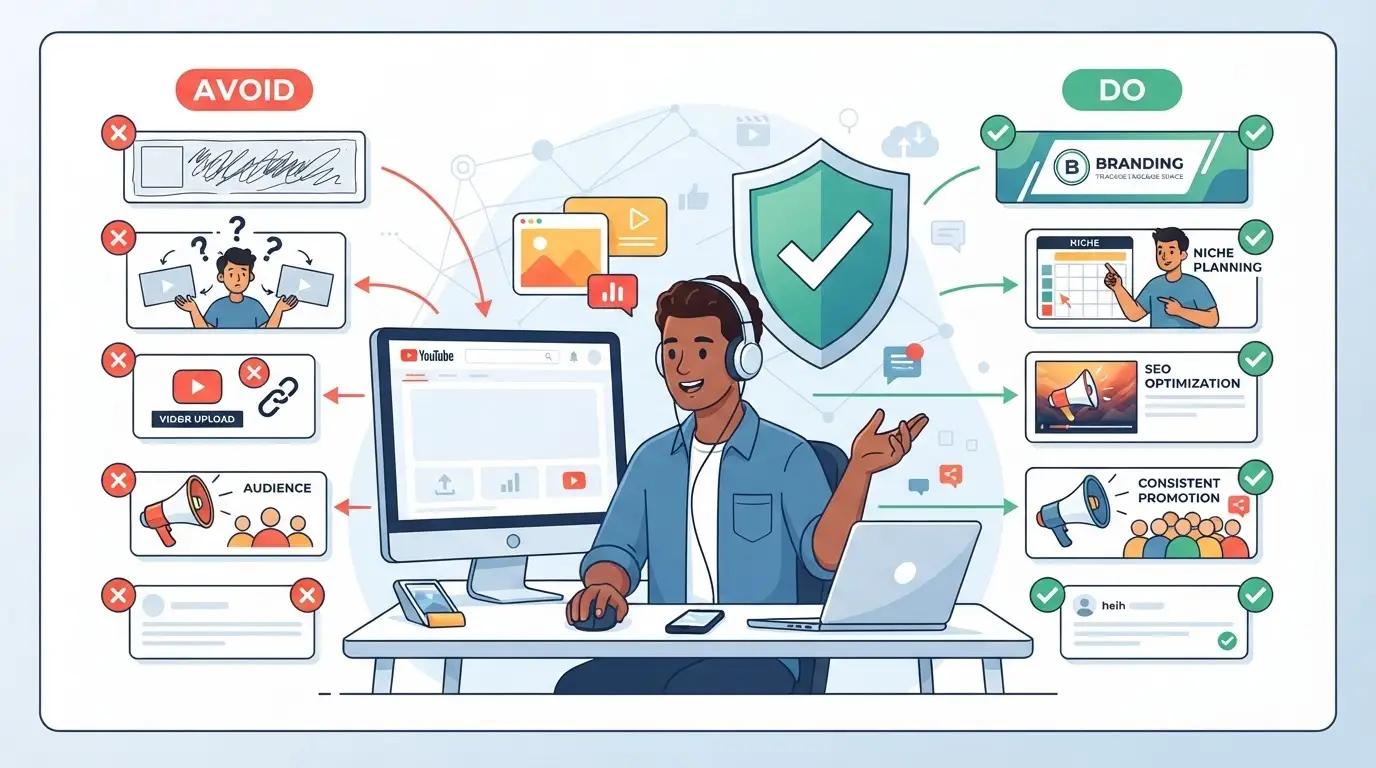
Most early YouTube bans and slow starts come from small, preventable setup mistakes. Before you focus on content or growth, check these risk points, one slip can lock your channel or trigger restrictions you can’t undo.
Using the same device or IP for multiple new channels
YouTube tracks patterns across devices and IP addresses. Starting several new channels from the same laptop or Wi-Fi in a short window almost always trips their fraud systems. If you’re managing more than one channel, use separate browser profiles and a trusted proxy for each. Reusing devices or IPs can cause instant review holds or even bans before your first upload.
Incomplete or misleading channel information
- Fill in all required channel details before uploading videos.
- Avoid fake names or stock avatars, YouTube flags low-effort branding fast.
- Use a unique description and profile image to look authentic.
Ignoring privacy and security basics
Leaving default settings risks exposing your location or identity. Double-check privacy controls before going public.
- Set recovery email and enable 2-step verification.
- Hide your real location in channel settings.
- Check what info appears on your public profile.
One careless detail here can cause a headache later. Once your channel is safe, you can move on to content planning and niche research.
How to Plan Your YouTube Channel Content and Find Your Niche
Most new creators stall out because they jump straight to filming without a clear focus or plan. The real shortcut is to work out what your channel stands for and who you’re trying to reach before you upload anything.
Finding your niche and unique value
A channel with a clear niche stands out and attracts loyal viewers. In 2026, strong niches include “AI art tutorials for beginners,” “budget travel in Southeast Asia,” and “no-equipment home workouts.” If your focus is too broad, you’ll blend in and struggle to get traction.
Researching your target audience
YouTube’s built-in analytics, free tools like Google Trends, and even scanning top comments on similar channels can reveal what your audience wants but isn’t getting. If you skip this step, you risk making videos that nobody searches for, think of posting “2022 smartphone reviews” in 2026. One practical tip: when you spot a question popping up again and again in a competing creator’s comment section, that’s a gap you can fill. The tradeoff is time; proper research can take hours, but it’s what sets apart channels that grow from those that stall.
Building your first content plan
- List 10-15 video ideas that fit your niche and answer real questions viewers have now.
- Use YouTube’s autocomplete and Google Trends to check what topics are rising, not fading.
- Prioritize your first three uploads by: potential search traffic, how quickly you can produce them, and whether they tease your niche’s main value.
Once your first plan is mapped out, you’ll be ready to film and upload with purpose instead of guessing. The next step is making sure your first video is set up for discovery so it doesn’t get buried right away.
How to Upload Your First Video and improve It for Discovery
You’ve planned your content, now it’s time to publish. Here’s how to upload your first YouTube video and set it up so real viewers can actually find it, not just stumble across it by chance.
Preparing your video file and metadata
- Export your video as MP4 (H.264), with 1080p if possible. Other formats might upload, but MP4 is the safest bet for speed and compatibility.
- Write a clear, keyword-focused title under 70 characters. If your title is vague, search won’t surface your video, no matter how good it is.
- Fill in a detailed description, add 1-2 sentences that explain the value, then include any links or credits. Skip empty descriptions; they hurt discoverability.
- Select 3-6 tags that match what people would search to find your video. Tags help, but don’t stuff them, YouTube now weighs titles and descriptions more.
Uploading and publishing your video
- Click the "Create" button in the top right of YouTube, then "Upload video".
- Drag your video file into the window. If you see a format error, re-export as MP4.
- While uploading, review the thumbnail, YouTube will auto-generate three. Pick the most eye-catching or upload your own for better click rates.
- Set visibility: "Public" for immediate release, "Unlisted" for private links, or "Scheduled" to publish at a specific time. If you forget this, your video might never appear in search.
Optimizing for search and recommendations
- Upload a custom thumbnail with readable text and a bright background. A dull or blurry thumbnail will tank click-through rates, no matter how strong your content.
- Add your video to a playlist that matches your topic. This links your new video to related content and boosts session time.
- Use end screens to suggest another video or playlist. If a viewer clicks away before the end, YouTube is less likely to recommend your channel next time.
- The biggest early win: match your title and description to real search phrases, not just your video name. That’s what pushes a new channel out of obscurity.
Now that you have your first upload live, the next challenge is handling multiple accounts without risking a ban or losing track of access.
Managing YouTube Operations with DICloak: Profiles, Proxies, and Team Permissions
Uploading your first video is just the start, once you handle more than one YouTube account or share access, new risks show up fast. Native tools don’t separate browser sessions, store proxy setups, or keep team actions isolated. Teams that need to manage multiple YouTube accounts without mixing up logins or exposing sensitive data can use DICloak for strict session separation and access control. DICloak works at the browser profile and permission layer, not inside YouTube itself.
Separating YouTube accounts with isolated browser profiles and fingerprint settings
Operators can create a dedicated DICloak browser profile for each YouTube account, with separate storage and fingerprint settings, like language, timezone, screen size, and WebRTC configuration, to match the intended environment for each workflow. This avoids session overlap and keeps login data from leaking between channels. The scope is limited to browser-profile access; it does not change any YouTube settings or content.
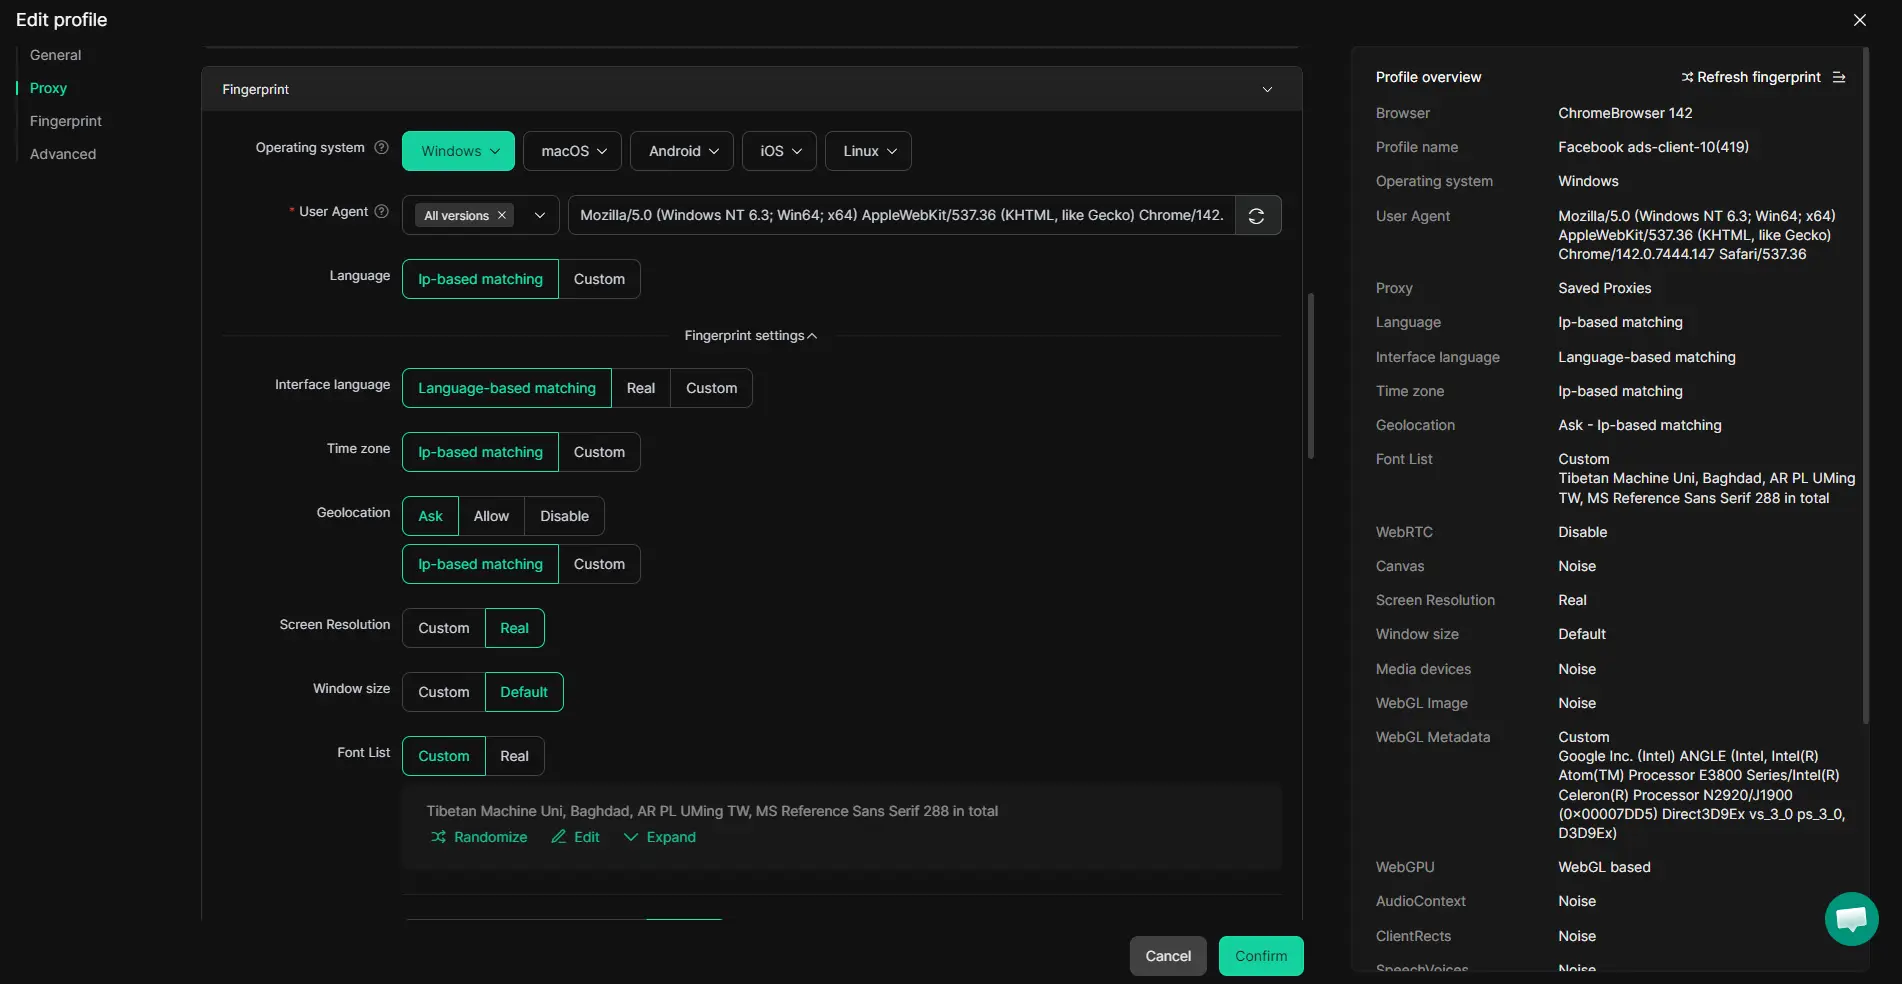
User-Provided Proxy Configuration for Assigned Profiles
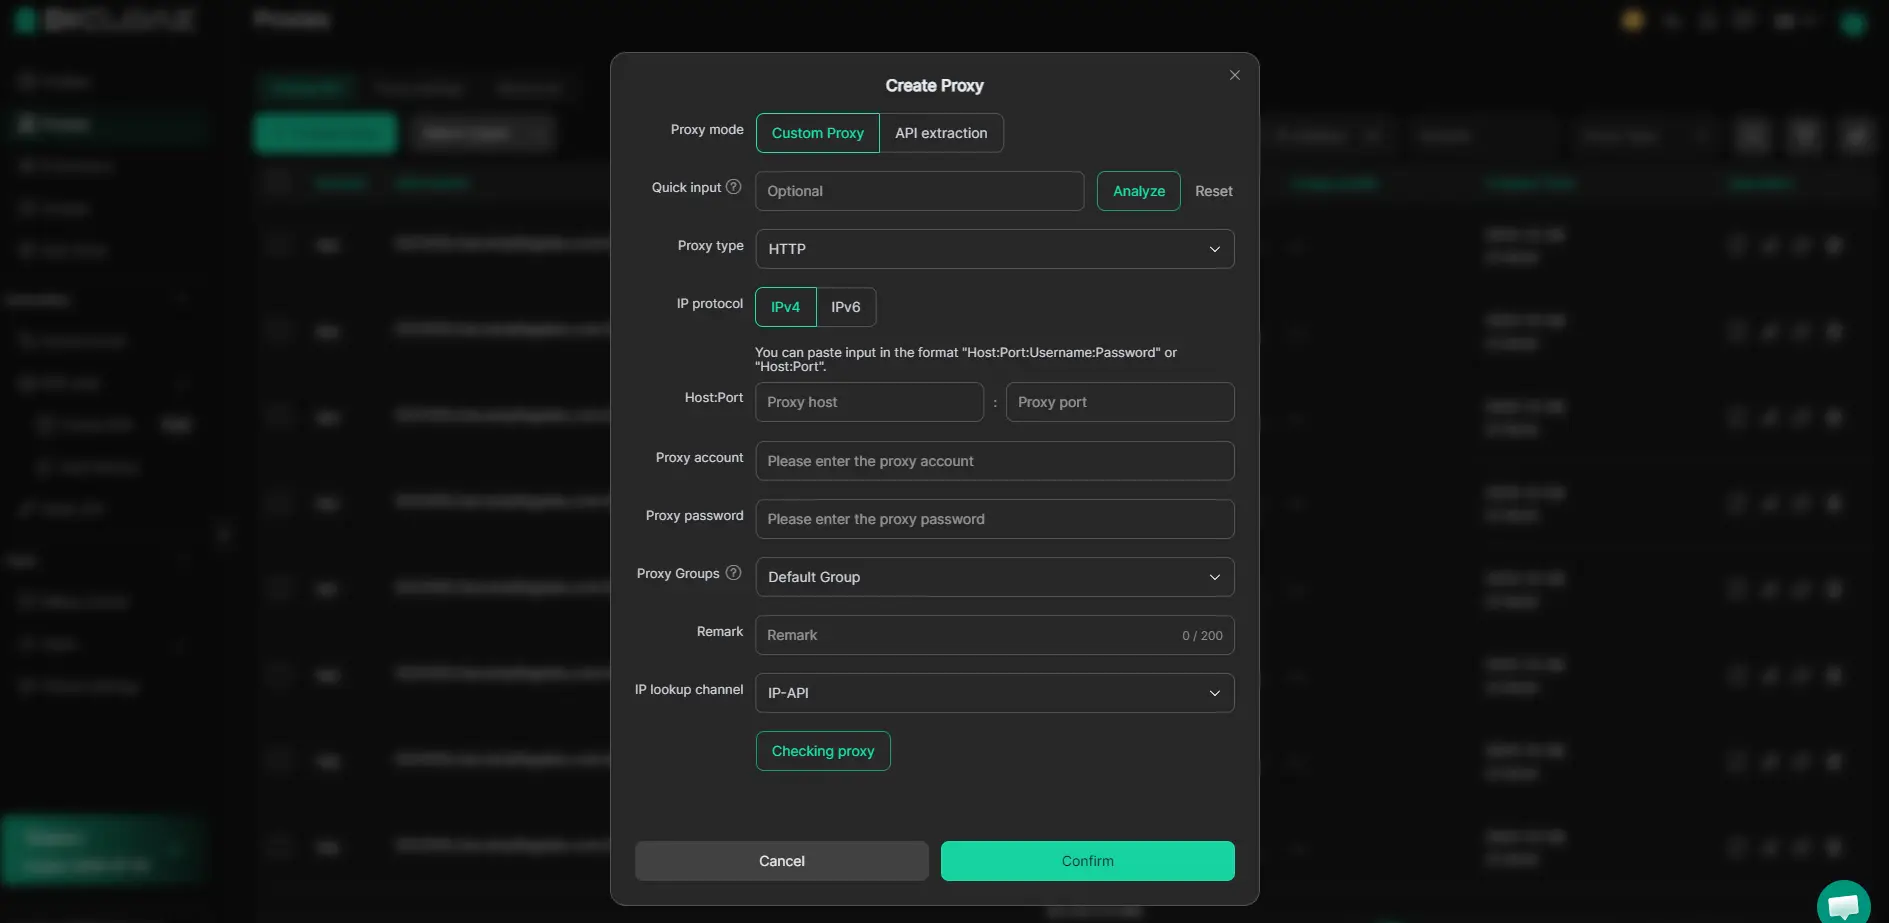
When an account workflow calls for a distinct network exit, users can configure their own proxy for each DICloak profile. Operators enter and test proxy credentials per profile, verifying the exit IP and location before starting a login. Proxy choice and quality remain the user’s responsibility, DICloak does not provide or sell proxies, and proxy settings only affect the network used by each profile.
Controlling team access and permissions for shared YouTube operations
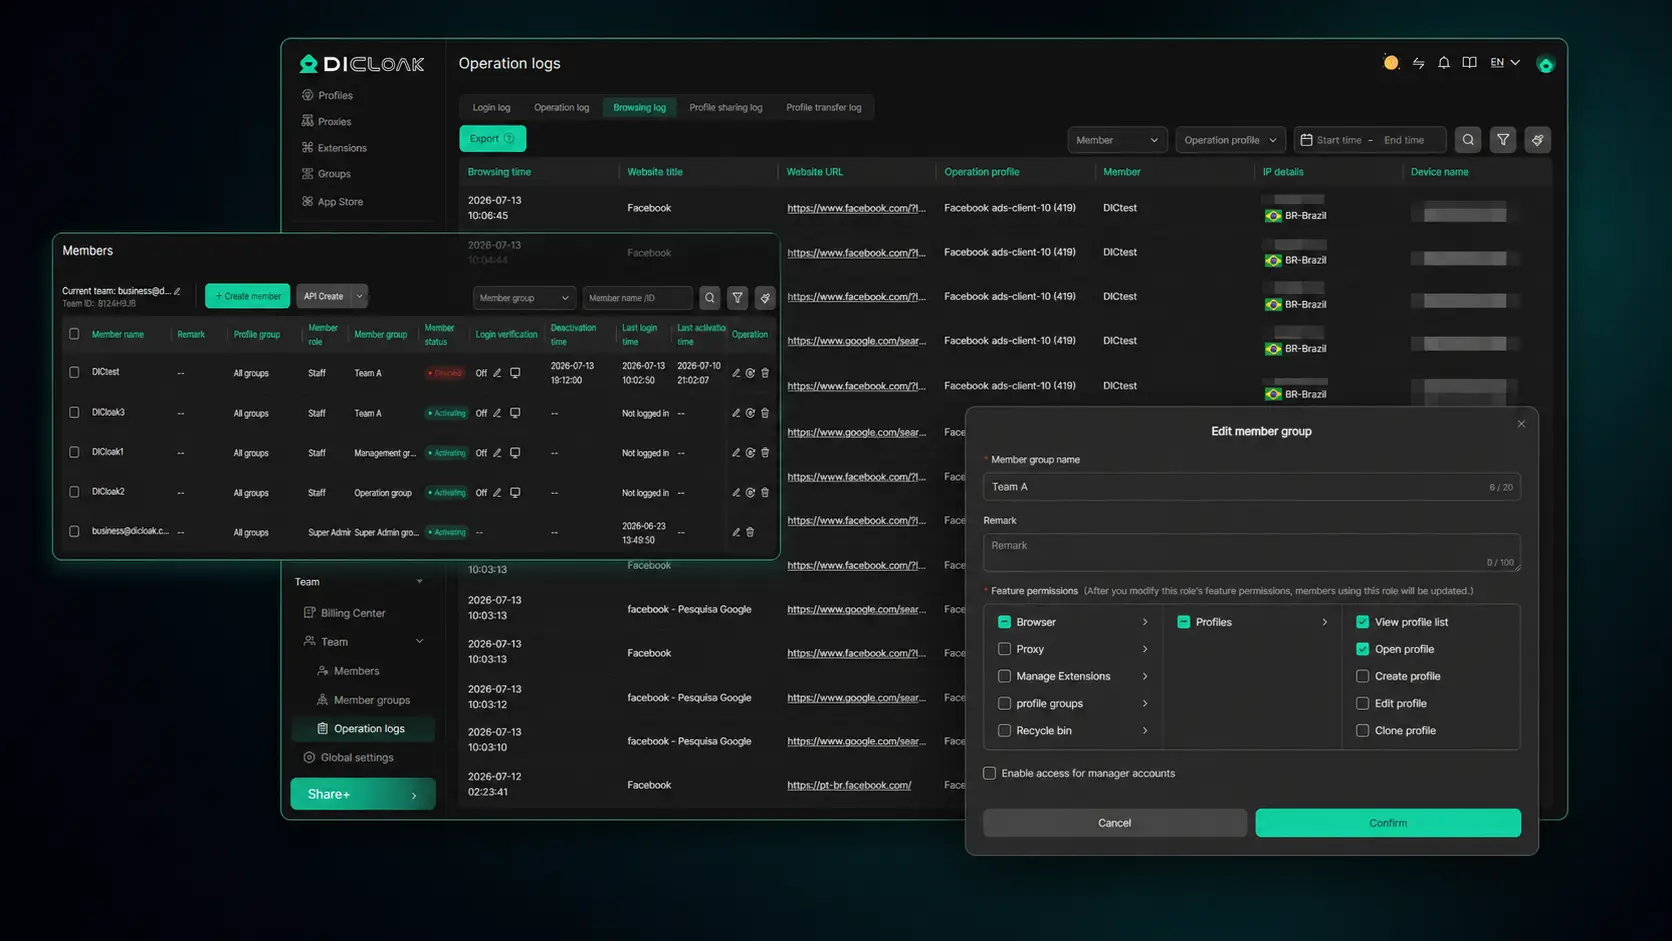
Admins can set up member groups in DICloak, assign only the required browser profiles to each team member, and restrict profile editing or transfer rights. This keeps team actions traceable and reduces the risk of accidental cross-account operations. DICloak permissions only govern access within its own workspace; they do not control YouTube’s own sharing or role settings.
Solid separation here makes early growth and analytics tracking much cleaner.
How to Grow Your YouTube Channel: Early Promotion and Analytics
Getting your first subscribers comes down to smart promotion and knowing what’s working. If you skip this, you’ll end up posting into the void with no feedback loop.
Promoting your channel on and off YouTube
- Share your videos in niche forums or Discords where self-promotion is allowed
- Collaborate with small creators, shoutouts or co-films get you in front of real viewers
- Add a pinned comment linking to your playlist, not just a single video
Understanding YouTube analytics for beginners
YouTube Studio’s dashboard shows which videos get real clicks, not just views. Focus on watch time and click-through rate, if your 30-second intro pulls viewers to 2 minutes, keep that format. Don’t waste time chasing empty subscriber spikes. Early growth sticks when you track what actually brings back repeat viewers, not just raw numbers.
When Should You Consider Advanced Tools or Workflows for YouTube Channel Management?
You need more than basic YouTube settings when you hit limits, like juggling many channels, sharing work with others, or running bulk updates. Most creators stick with standard tools until they start losing track or wasting time on manual steps.
Signs you need advanced management (multi-account, team, automation)
| Scenario |
Basic Tools Work? |
Advanced Solution Needed? |
| One personal channel |
✔️ |
❌ |
| Two+ channels, solo |
✔️ |
Maybe for logins |
| Team uploads or editors |
❌ |
✔️ |
| Bulk scheduling, auto-tasks |
❌ |
✔️ |
If you’re switching between accounts daily or need to let others edit videos without sharing your password, it’s time to move up.
What advanced workflows and tools offer
You get browser profiles to keep logins separate, team permissions so no one oversteps, and automation to batch uploads or data pulls, the main gain is less manual work and fewer mistakes.
Frequently Asked Questions About create youtube channel
Can I create a YouTube channel without a Google account?
No, you must have a Google account to create a YouTube channel. YouTube uses Google’s sign-in system for all new channels. Even if you already use YouTube to watch videos, you’ll need to log in with a Google account before you can start uploading videos or customizing your own channel.
How many YouTube channels can I create with one Google account?
You can create up to 50 YouTube channels under a single Google account. Many creators set up different channels for separate topics, brands, or projects. However, each channel should have a clear purpose. Avoid overlapping content or spammy behavior, as this can risk all channels under that account.
Is it safe to manage multiple YouTube channels from the same device?
Managing several channels from one device is possible but not always safe. YouTube may link accounts that share devices or IP addresses. To lower risks, use separate browser profiles for each channel and consider a proxy or proxy. This helps keep logins and activities isolated, reducing the chance of accidental cross-account issues.
What should I do if my new YouTube channel is restricted or banned?
First, review the email or notification from YouTube to see which policy was violated. Double-check your channel setup, content, and recent uploads for mistakes. If you believe the action was a mistake, use the appeal process in YouTube’s support center. Follow all steps carefully and provide any requested information.
Can I share YouTube channel access with a team securely?
Yes, you can add team members by assigning them roles using YouTube Studio’s permissions. Each member should use their own Google account. For extra safety, set up separate browser profiles and avoid sharing passwords. This way, you can control who has access and track any changes made to the channel.
Now is the ideal moment to decide on your channel’s unique purpose and start producing your first videos. Take the leap by setting up your brand elements and experimenting with content that reflects your vision. Try DICloak For Free
 Web Proxy Tools
 Free Tools
 Cookie Plugin
 UA Generator
 MAC Address Generator
 IP Generator
 IP Address List
 2FA Code Generator
 World Clock
 Anonymous Check
 WebRTC Leak Test
 UUID Generator
 Free Web Proxy Site
 Proxy Checker
 FB Ad Checker
 AI Web Scraping
 Free SMM Tools
 Twitter Shadowban Checker
 Instagram Name Checker
 UTM Generator
 Username Generator
 AI Hashtag Generator
 LinkedIn Headline Generator
 Social Media Image Resizer