Trying to delete your Uber account or wondering if you can have more than one? Maybe you're looking to start fresh, keep work and personal rides separate, or just tighten up your online privacy. Whatever the case, here's what you need to know to manage your Uber accounts the right way.
Why would you want to delete your Uber account?
Uber is a convenient way to get from point A to point B, but it also raises some privacy concerns. The app collects and stores personal information, including your full name, phone number, profile picture, payment details, and ride history. Additionally, Uber shares some of this data with third parties for advertising and internal use, which can lead to targeted ads and potential privacy risks.
Cybersecurity is another issue that has troubled Uber over the years. The company has faced multiple data breaches, some of which exposed customer information. Notably, Uber suffered security breaches in 2016, 2022, and 2023. While the earlier attacks compromised user data directly from Uber’s servers, the 2023 incident involved a third-party law firm, raising even more concerns about data security.
Despite Uber’s efforts to improve its data protection policies, many users still feel uncomfortable with how their information is handled. If you’re one of them and have decided to switch to a different ride-sharing service or simply want to remove your account for good, here’s how to delete Uber account.
How to Delete Uber Account: Two Easy Methods
If you’ve decided to remove your Uber account, you have two options:
- Using the Uber mobile app
- Deleting your account online via a desktop browser
In both cases, Uber will send a verification code to confirm your request before permanently deleting your account. Below, we’ll walk you through the step-by-step process for both methods.
How to Delete Uber Account on the Mobile App
If you prefer to delete your Uber account using your mobile app, follow these simple steps:
Open the Uber app and tap on the “Account” section in the bottom-right corner.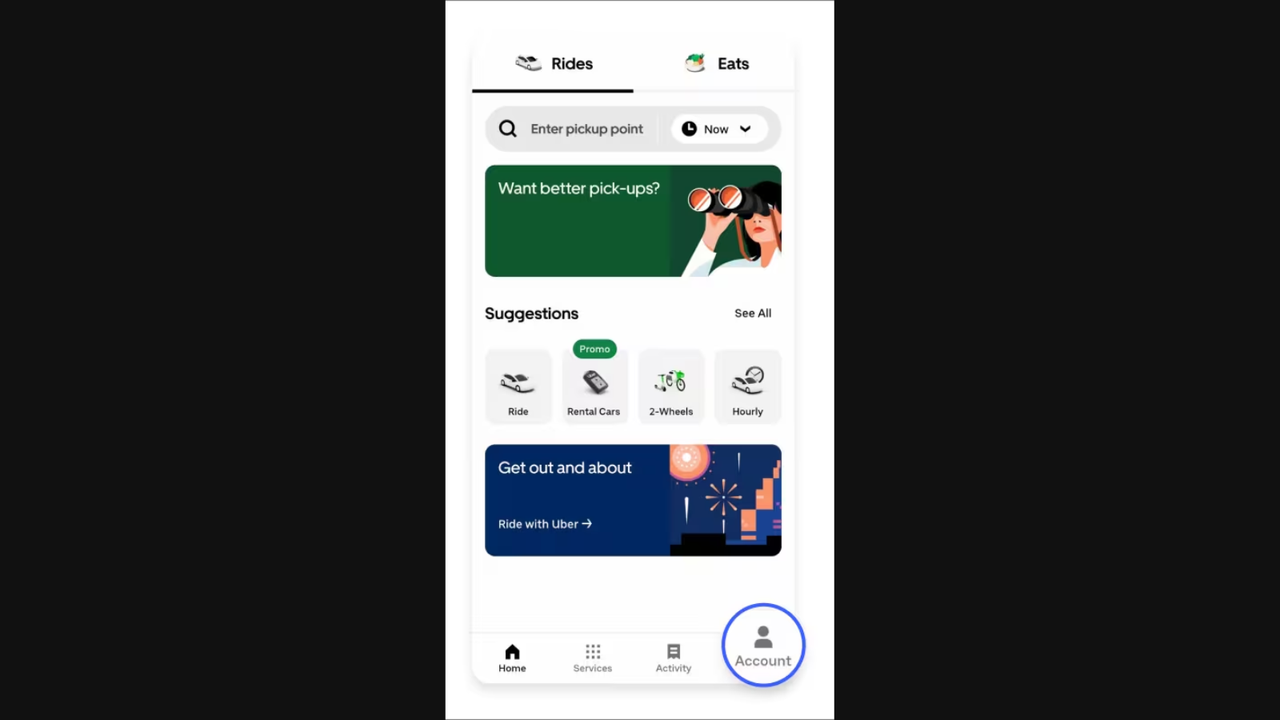
Go to “Settings”, then select “Privacy.”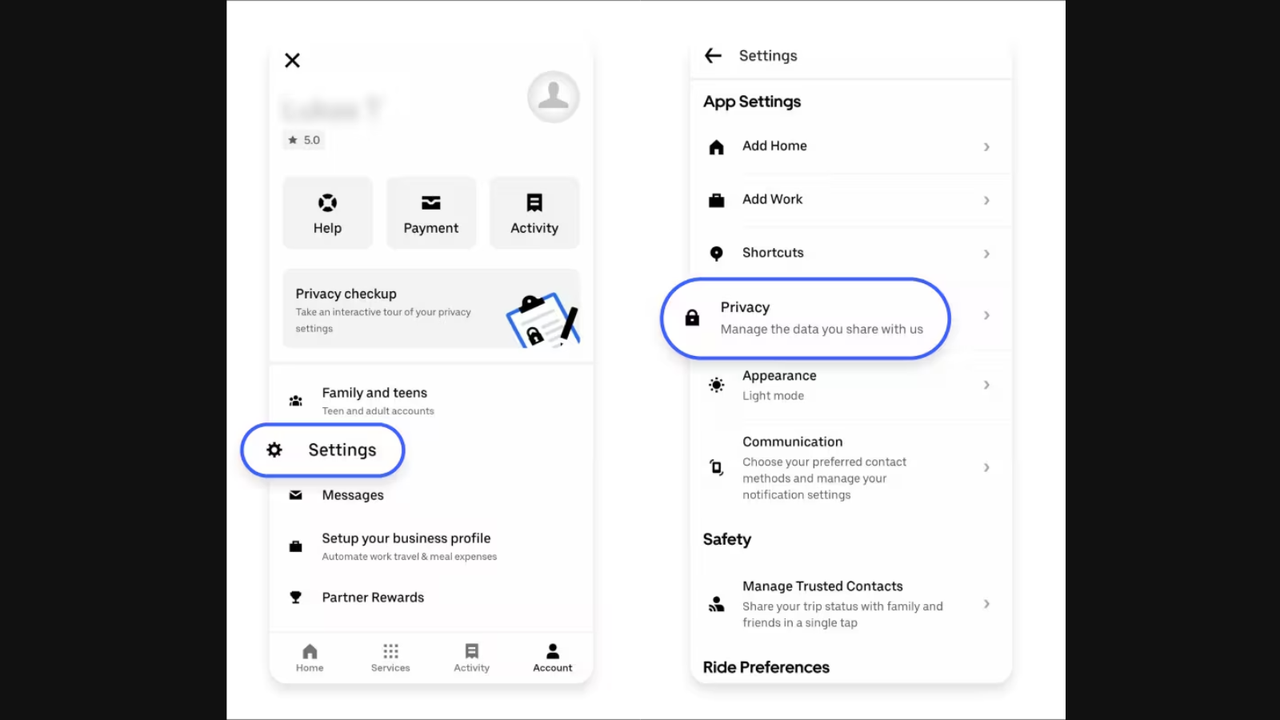
Scroll down and tap “Account deletion.”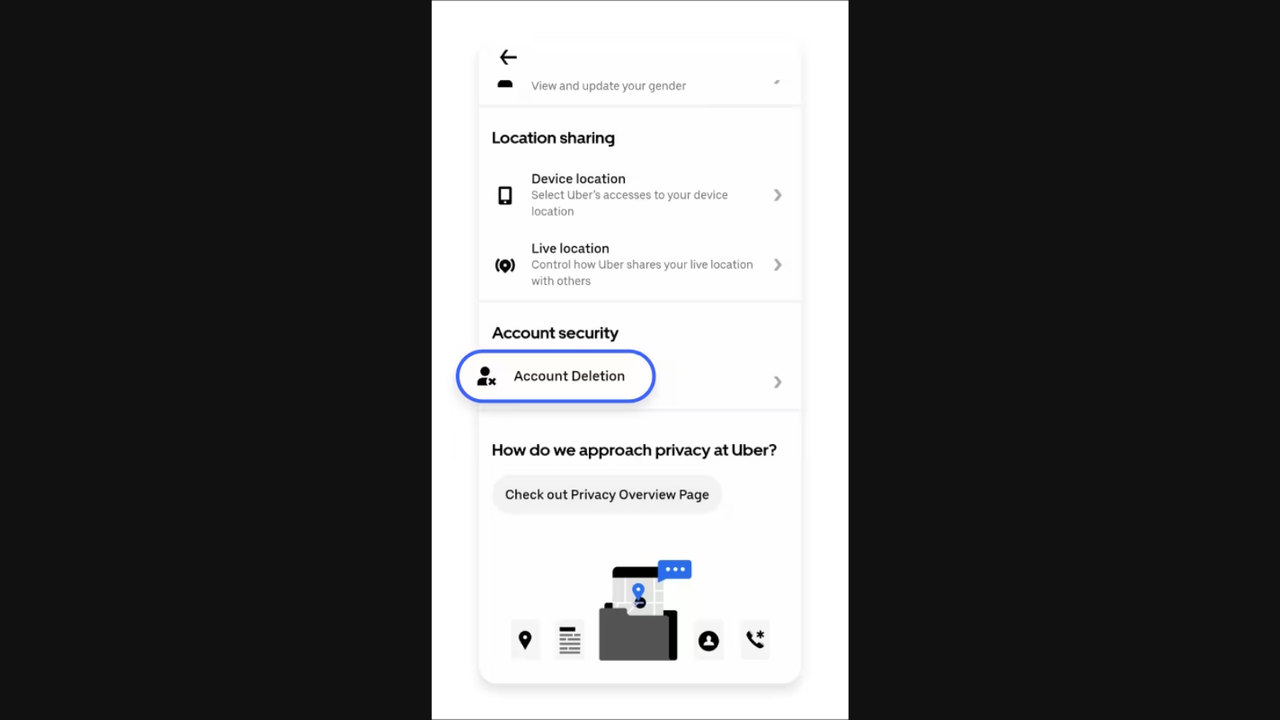
Verify your identity by entering your email or phone number, then tap “Next.”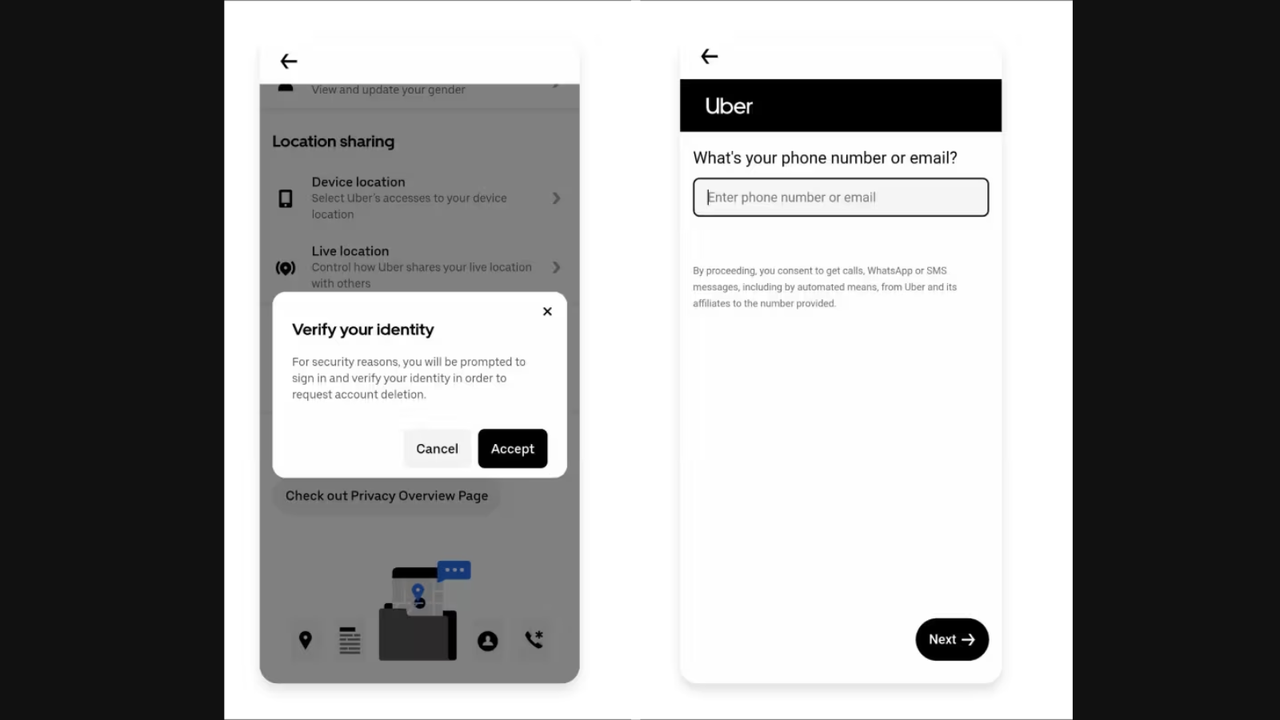
Uber will send a verification code to your email or phone. Enter the code in the app to confirm the deletion process.
Once you delete your Uber account, it will be deactivated for 30 days. If you don’t log back in during this period, Uber will permanently remove your account and all associated data. However, if you change your mind, you can reactivate your account within 30 days by signing in again.
How to Delete Uber Account on Desktop
If you prefer to delete your Uber account from a desktop browser, follow these simple steps:
Go to Uber’s account deletion page and select the account you want to delete. Then, click “Continue” (If you have only one account, simply proceed).
Choose a reason for deleting your Uber account.
Click “Delete account” to finalize the process.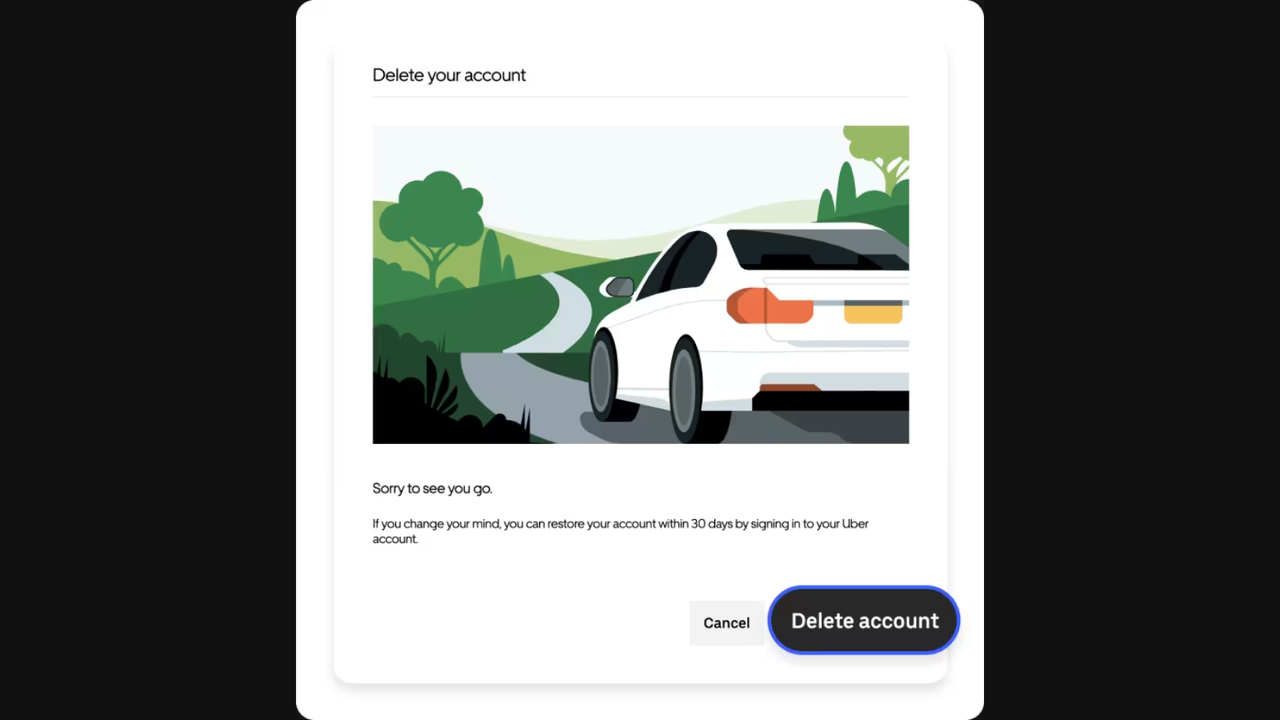
If you're unable to delete your Uber account using these methods, you may need to contact Uber’s customer support for further assistance.
What to consider before deleting your Uber account
Once you delete your Uber account, you still have 30 days to recover it. After this period, Uber will permanently delete your account, along with any earned points, rewards, or bonuses. Additionally, if your Uber account is linked to Uber Eats or an Uber driver account, those will also be removed.
Before deleting your account, make sure to complete any pending rides and payments—otherwise, Uber won’t allow you to proceed with the deletion.
Alternative Methods for Deleting an Uber Account (if Standard Process Fails)
If you're having trouble deleting your Uber account through the app, don't worry—there are alternative methods to remove your account permanently. Whether you're facing technical issues or verification problems, these steps can help.
1.Delete Your Uber Account via the Web Privacy Portal
If the Uber app isn’t working, you can delete your account using Uber’s Privacy Center on a desktop or mobile browser. Follow these steps:
- Visit myprivacy.uber.com and log into your Uber account.
- Follow the on-screen instructions to request account deletion.
- Enter the verification code Uber sends to your email or phone.
- Confirm your request, and Uber will deactivate your account for 30 days before permanent deletion.
- This method is a great backup option if the app is glitching or unresponsive.
2.Contact Uber Support for Manual Account Deletion
If self-service methods fail, you can reach out to Uber’s customer support for assistance. Uber provides a dedicated help form for users who are unable to delete their accounts:
- Visit help.uber.com and search for “I was unable to delete my account”.
- Fill out the account deletion request form and explain the issue.
- Provide a valid email address and verify your identity.
- Uber’s support team will manually process your request and follow up via email.
If you've checked that no trips are active and no payments are due but still can’t delete your account, contacting Uber support directly is the best option.
3.Fix Common Issues Preventing Account Deletion
Before reaching out to support, ensure you’ve resolved these common blockers:
- Complete all rides and orders – Uber won’t allow account deletion if a trip or Uber Eats delivery is still active.
- Settle any outstanding payments – If there’s an unpaid balance on your account, you must clear it first.
- Check for account restrictions – If your account is under review due to safety concerns or other issues, you may need to resolve the restriction before deleting it.
- Taking care of these issues can often allow the deletion process to proceed smoothly.
4.Verify Your Contact Information
A common problem when deleting an Uber account is not receiving the verification code. This often happens when your account is linked to an old phone number.
If you’re not receiving Uber’s SMS code:
- Update your phone number in the Uber app settings and try again.
- If you no longer have access to your registered phone number, visit help.uber.com and follow Uber’s process to update your contact details before retrying deletion.
5.Last Resort: Email or Social Media Support
If you can’t log into the app or Uber’s help portal, you can contact Uber support via email or social media:
- Email: Send a request to support@uber.com explaining your issue.
- Social Media: Reach out to Uber via Twitter (@Uber_Support) or Facebook (@Uber) for assistance.
- When using these methods, be ready to verify your identity by providing details like your registered email or phone number.
It is possible to have Multiple Uber accounts
Technically, yes, it is possible to create multiple Uber accounts using different phone numbers and personal information, but Uber's terms of service generally discourage users from having more than one account associated with the same person; doing so could lead to account suspension or deletion if detected.
Key points to remember:
- One phone number per account: To create a new Uber account, you typically need a unique phone number.
- Family Profiles: If you want to share Uber access with family members, you can use the "Family Profile" feature, which allows multiple users to access rides through a single primary account.
- Potential consequences: Creating multiple accounts with the same personal information can be seen as fraudulent activity by Uber, leading to account restrictions.
How to Create Multiple Uber Accounts
Many users wonder if they can create multiple Uber accounts, whether for Uber Eats, Uber Rides, or Uber Driver services. The short answer is yes, but there are certain restrictions you need to follow.
Creating multiple Uber accounts is not illegal, but Uber enforces strict rules regarding account setup. One of the biggest restrictions is that each Uber account must have a unique phone number and email address. You cannot link the same phone number to two different Uber accounts simultaneously. This applies to both Uber riders and Uber drivers. If you want a second Uber account, you’ll need to register using a different phone number and email.
If you want to create multiple Uber accounts—whether for separating work and personal rides, using different payment methods, or managing Uber Eats orders separately—you can do so by following these steps:
Sign out of your existing Uber account – Before creating a new account, go to the Uber app settings and log out.
Open the Uber app and tap “Get Started.”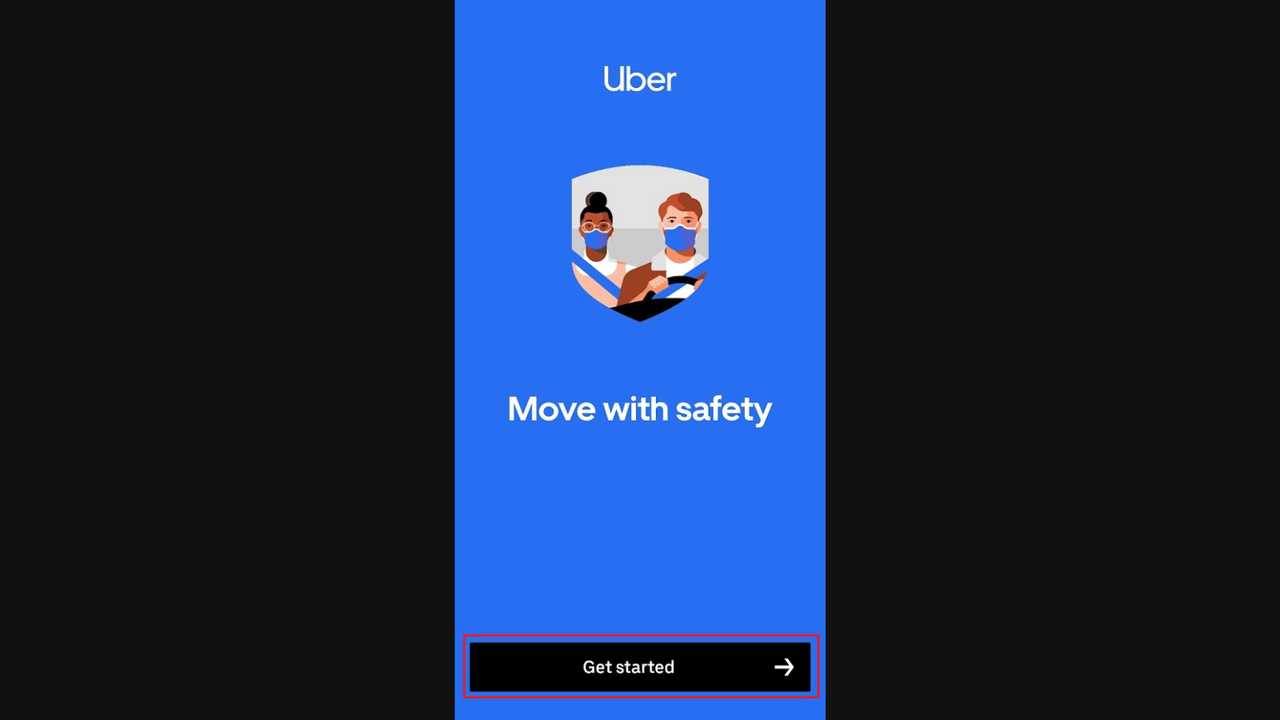
Choose a sign-up method – You’ll be prompted to enter a phone number. Instead of selecting your existing number, tap “None of the Above.”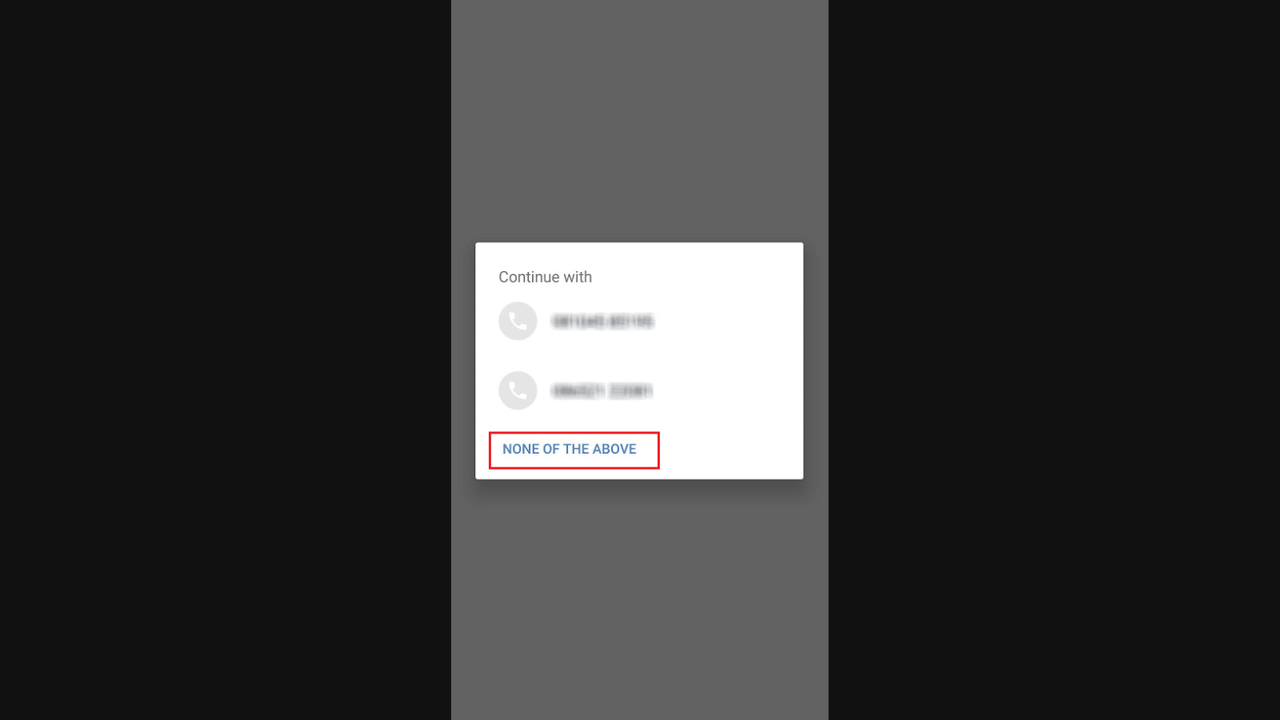
Enter a different phone number or select “Continue with Google, Apple, or Facebook” to sign up using another account.
Enter your personal details – Provide your first and last name, along with your new phone number.
Follow the on-screen instructions to verify your phone number and complete the account setup.
If you plan to use both Uber accounts on one phone, you’ll need to log in and out manually when switching between accounts. Alternatively, you can use a second phone or app-cloning feature to keep both accounts active.
How to Make a New Uber Account with the Same Number?
If you're wondering whether you can create a new Uber account with the same phone number, the short answer is no. Uber does not allow two accounts to be registered under the same number. If you want to use your existing number for a new Uber account, you must first delete your old account before signing up again.
Step 1: Delete Your Existing Uber Account
Before creating a new Uber account, you need to permanently remove your old one. Follow these steps to delete your Uber account:
- Open the Uber app and tap the profile icon in the top-right corner.
- Go to Help > Account and Payment Options > Changing My Account Settings.
- Scroll down and tap “Delete My Uber Account.”
- On the next screen, swipe down and tap the “Delete My Uber Account” link.
- Enter your registered email address, then check your email inbox for a Login Request from Uber.
- Click the link in the email and follow the instructions on the Uber account deletion page.
- Tap “Continue”, select a reason for deleting your account, and then confirm by tapping “Delete Account.”
🚨 Note: Uber deactivates your account immediately, but it remains in a 30-day grace period before permanent deletion. If you log back in within 30 days, your account will be reactivated, and you'll need to restart the deletion process.
Step 2: Create a New Uber Account with the Same Phone Number
Once your old Uber account has been successfully deleted, you can create a new account using the same phone number. Here’s how:
- Open the Uber app and tap “Get Started.”
- Enter your phone number (previously used with your old account).
- Tap “Next” and follow the on-screen instructions to verify your number.
- Enter your name, email, and preferred payment method.
- Complete the signup process by following Uber’s identity verification steps.
- Your new Uber account is now ready to use with the same phone number!
- If you want to use your existing phone number for a new Uber account, you must delete your old account first. Uber does not allow duplicate accounts with the same number, so following the account deletion and re-registration process is the only way to reuse your number.
By following these steps, you can successfully remove your previous account and start fresh with a new Uber profile while keeping your same phone number.
How to Manage Multiple Uber Accounts with DICloak Antidetect Browser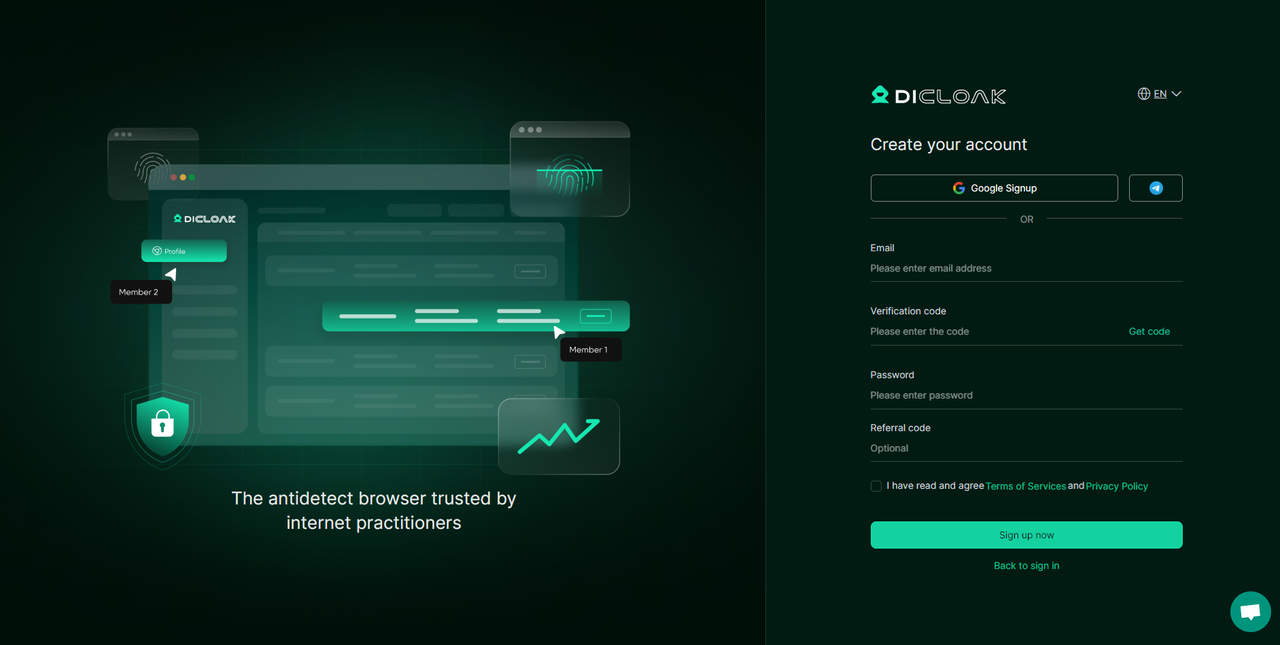
DICloak isn’t just another privacy browser—it’s a powerful tool for managing multiple Uber accounts securely. Unlike standard privacy browsers that only mask your identity, DICloak creates a unique digital fingerprint for each account.
Its advanced fingerprinting engine ensures every Uber profile appears as a separate, real user. While it looks like a Chrome-based browser, DICloak fully isolates profiles, assigning each one a distinct IP, cookies, and device characteristics to prevent Uber from linking accounts.
This is especially valuable for Uber drivers, Uber Eats couriers, or frequent account switchers. Uber tracks logins, devices, and IPs, flagging suspicious activity that can lead to bans or restrictions. DICloak helps you bypass these risks by keeping each account separate and undetectable.
By using individual browser profiles, you reduce the chances of forced re-verifications, shadowbans, or permanent suspensions, ensuring smooth and secure multi-account management.
Key Benefits of Using DICloak to Manage Multiple Uber Accounts Safely
1.Isolated Browser Profiles for Each Uber Account
Using an antidetect browser like DICloak for multiple Uber accounts ensures each profile has a unique browser fingerprint. This makes every account appear as if it's accessed from a different device and location, reducing the risk of detection.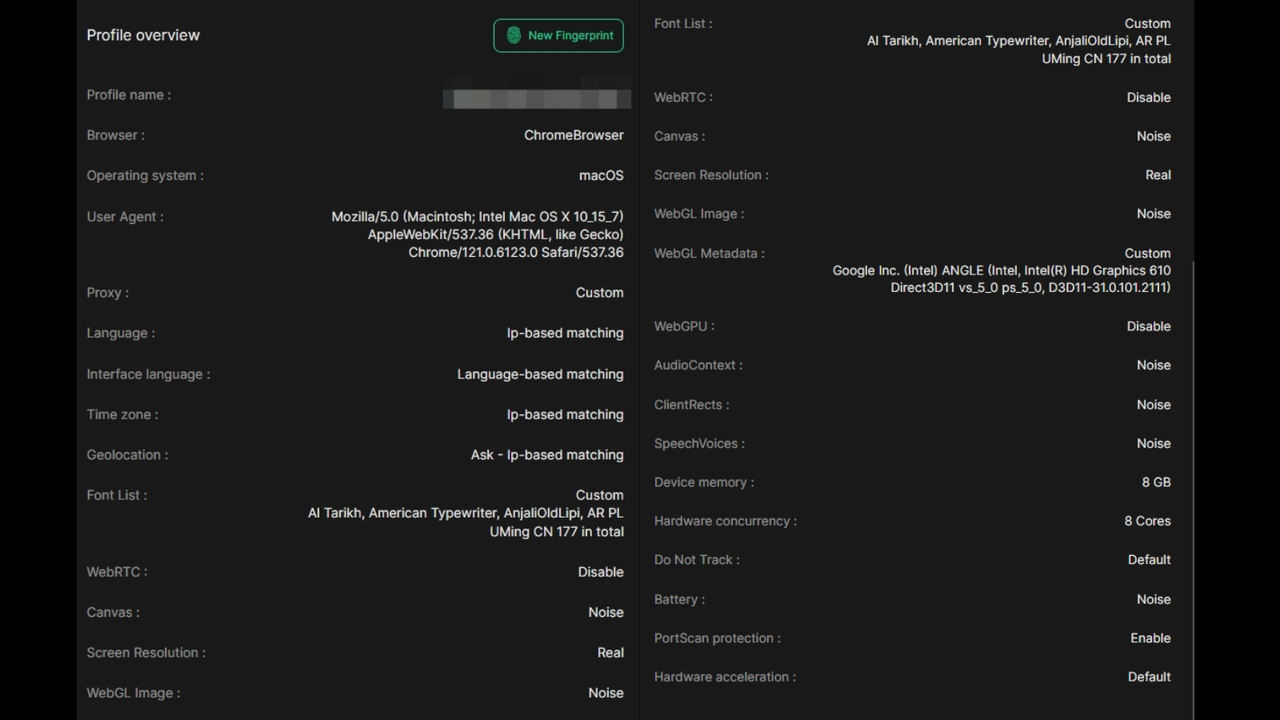
Uber monitors IP addresses, device IDs, and login patterns to flag suspicious activity. Logging into multiple accounts from the same device can lead to restrictions or bans. An antidetect browser assigns each account a separate identity, making it harder for Uber to detect multiple accounts.
With this tool, you can create and manage isolated browser profiles, each with its own settings, cookies, and user data. This prevents Uber from linking accounts, minimizing the risk of restrictions or bans.
2.Efficient Multi-Account Management
DICloak’s profile management makes handling multiple Uber accounts effortless. It automatically restores the last session, so when you reopen a profile, your previous pages are ready—eliminating the need to log in again. This saves time and reduces the risk of Uber flagging frequent logins.
The multi-open mode feature lets multiple team members use the same profile simultaneously. With multi-open sessions, Uber accounts stay logged in, removing the hassle of constant logins or credential sharing.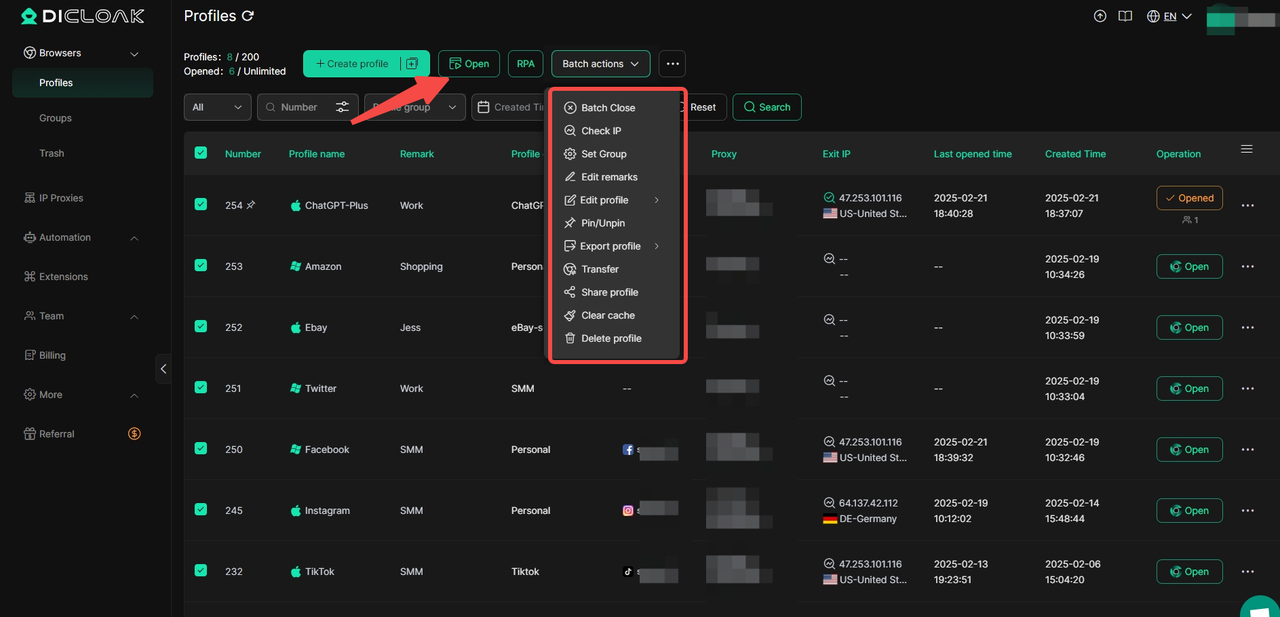
DICloak also supports bulk actions, allowing you to create, import, delete, update, and transfer profiles with a few clicks. This streamlines account management, making it faster and more secure.
3.Enhanced Security & Privacy Protection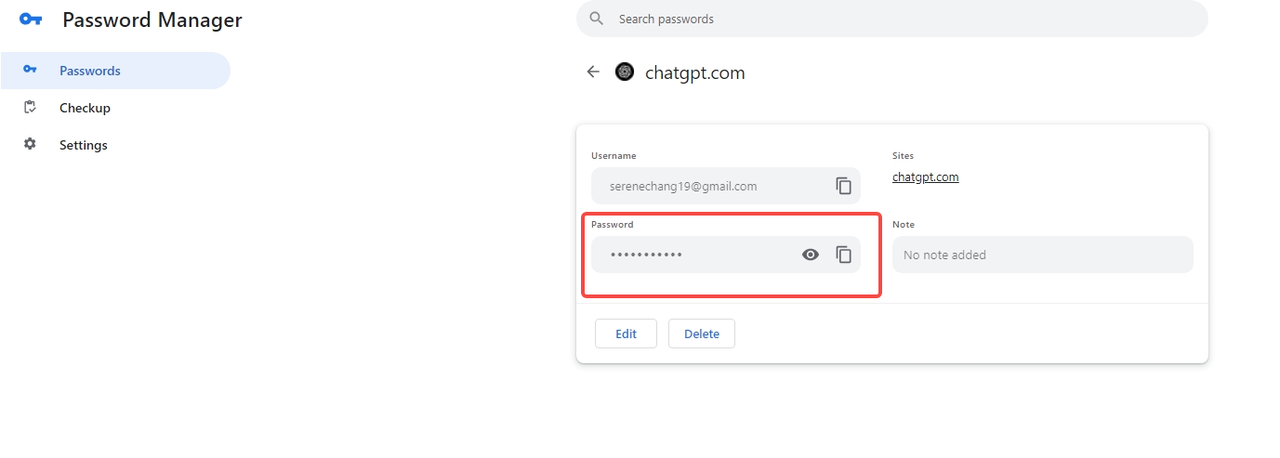
DICloak goes beyond just managing multiple Uber accounts—it’s also the best platform for securely sharing Uber profiles without exposing passwords or cookies. This is especially useful for teams or businesses that need to manage multiple Uber accounts while maintaining security and control.
With DICloak’s team-sharing feature, you can pre-configure access settings for team members. You decide who can open and close profiles, preventing unauthorized actions that might trigger Uber’s security system. More importantly, you can set permission restrictions to prevent data leaks, ensuring that sensitive account information stays protected.
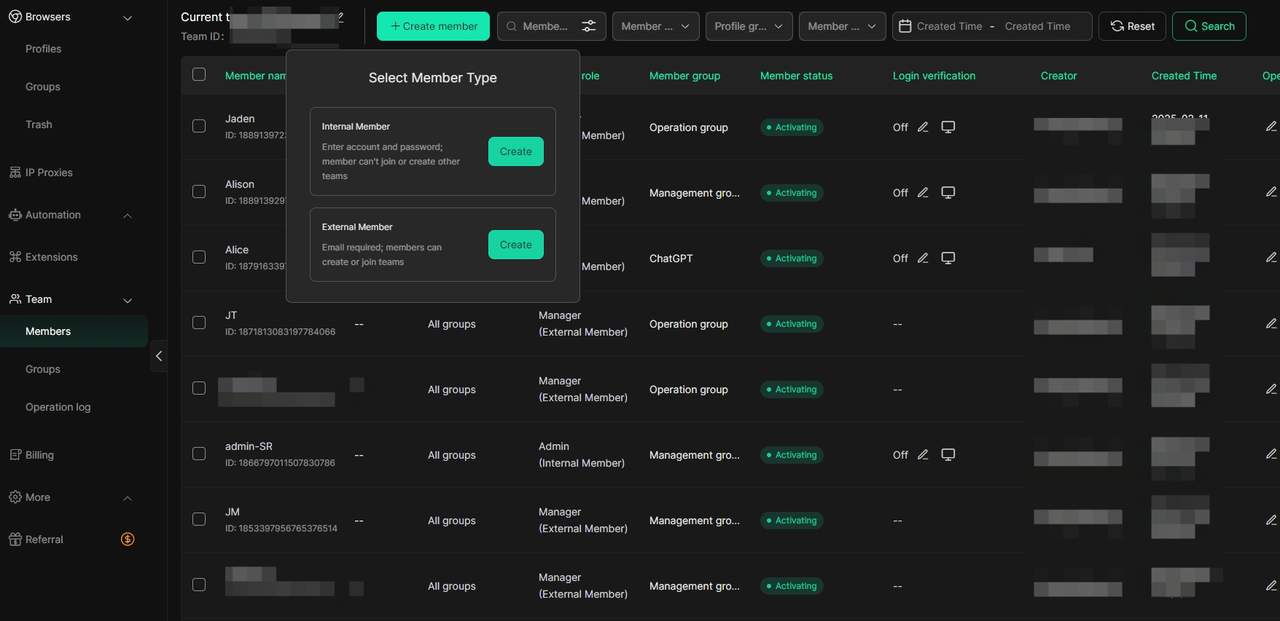
This makes collaborative account management safe, efficient, and risk-free, allowing teams to work together without compromising security.
4.Integrate IP Addresses to Avoid Bans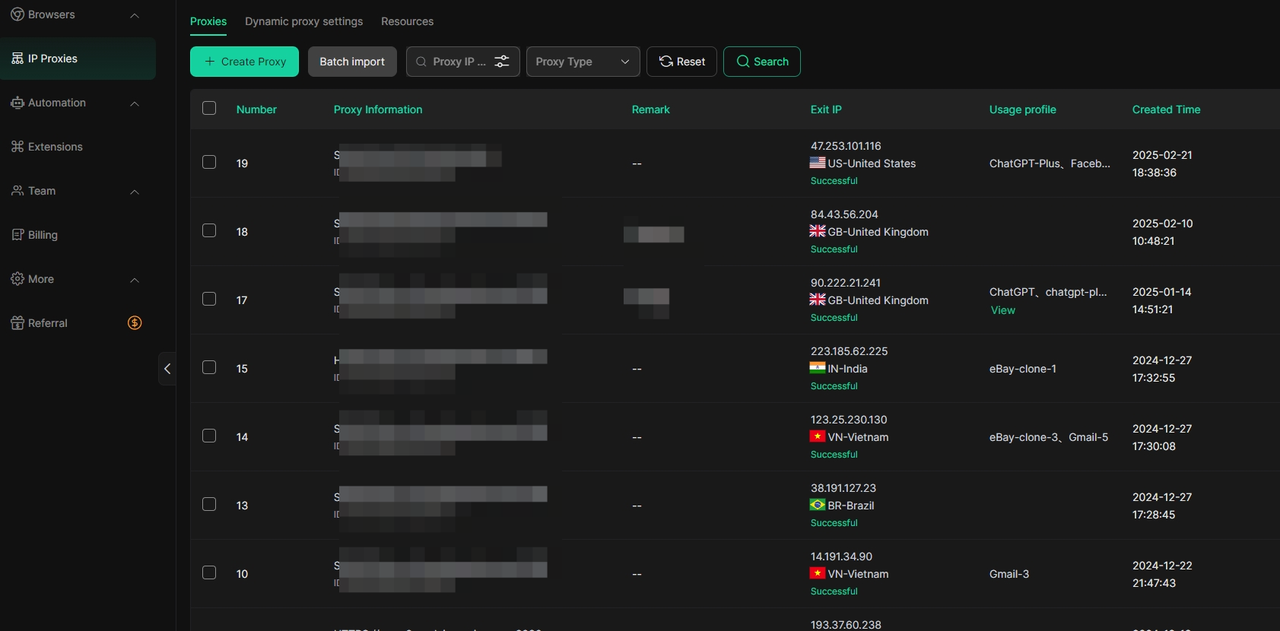
Many antidetect browsers make it easy to connect with external proxy services, helping you hide your real IP address and appear as if you're logging in from different locations. This is especially useful for managing multiple Uber accounts, as Uber tracks IP addresses and may flag accounts that frequently log in from the same location.
By using residential proxies or rotating IPs, you can reduce the chances of triggering Uber’s security system, which often flags repeated activity from a single IP as suspicious behavior. This helps avoid bans or account restrictions while keeping your accounts running smoothly.
DICloak has now partnered with top-tier proxy providers, giving you access to high-quality, reliable IPs. Not only does this make choosing the right IP hassle-free, but you also get exclusive deals on premium proxies—making it even easier to manage your Uber accounts safely and efficiently!
The Bottom Line
If you're thinking about deleting your Uber account or juggling multiple profiles, it's important to do it the right way. Uber tracks logins, devices, and locations, so managing multiple accounts or removing one permanently requires a smart approach. Whether you're switching services or just want better privacy, we've got the steps to help you stay in control.
FAQs about Uber account
How do I delete my Uber account permanently?
- Tap the “Account” section in the bottom right corner.
- Tap on “Settings,” then “Privacy.”
- Scroll down and tap on “Account deletion.”
- Accept the identity verification prompt and type in your email or mobile phone number. Once done, tap “Next.”
Why can't I delete Uber?
You won't be able to delete your Uber account if you have an outstanding payment. Please clear the payment before deleting your account. Once you delete your account, it will be immediately deactivated. After 30 days, it will be permanently deleted, and any unused credits, promotions, or rewards will be removed.
How do I delete a profile from Uber?
- Go to Account, then Settings.
- Select Privacy.
- Scroll down and tap Account Deletion.
- Follow the remaining steps in the app to complete the process.
What happens when you delete Uber?
After completing either process above, your account will be immediately deactivated and then permanently deleted after 30 days. Any unused credits, promotions or rewards will be removed. If you sign back into your account during this period, your account will be restored.
Does Uber delete inactive accounts?
As a best practice for privacy and security, we periodically delete accounts that haven't been used for an extended period. When this happens, we'll send you an email, app notification, or SMS text message to let you know that your account is scheduled for deletion.
How do I remove my phone number from Uber?
To change your Uber rider account's password, phone number, email address, or name, Go to the application's menu and select "Settings." Click the bar that shows your name, phone number, and email address. To make changes, tap the details you want to change and input the new data.
 Web Proxy Tools
 Free Tools
 Cookie Plugin
 UA Generator
 MAC Address Generator
 IP Generator
 IP Address List
 2FA Code Generator
 World Clock
 Anonymous Check
 WebRTC Leak Test
 UUID Generator
 Free Web Proxy Site
 Proxy Checker
 FB Ad Checker
 AI Web Scraping
 Free SMM Tools
 Twitter Shadowban Checker
 Instagram Name Checker
 UTM Generator
 Username Generator
 AI Hashtag Generator


